Buy Signed Copies of The War Underground 1914-18 and World War I Gas Warfare

“This is an outstanding and very readable account of the war underground throughout the First World War. It is strongly recommended.”

Bulletin of the Military Historical Society

I am able to offer signed copies of my book The War Underground 1914-18 (Osprey Elite Series) for £14 UK (RRP £14.99) or £18 Europe or £20 Rest of the World. All prices include UK 2nd Class or International Standard postage. Contact me for payment details (PayPal preferred).

I am also offering my World War I Gas Warfare Tactics and Equipment (Osprey Elite Series) for the same price. You can also buy both titles together for £26 UK or £34 Europe or £37 Rest of the World. All prices include UK 2nd Class or International Standard postage.


Very limited numbers of my 2010 book Underground Warfare 1914-1918 are still available here.


Read my blogpost: Myths of Messines: ‘The Lost Mines’


Blogpost: The Story of the Lochnagar Mine


The ambulance wagon at Ecoivres: Ralph Vaughan Williams’ Pastoral Symphony & the Great War

On the last day of 1914, at the age of forty-one, the composer Ralph Vaughan Williams lied about his age to join the ranks of the Royal Army Medical Corps. He was to serve in the Army for the remainder of the First World War.

Ralph Vaughan Williams with the 2/4th London Field Ambulance at Saffron Walden in 1915. (© Vaughan Williams Foundation)

The experience inspired his Pastoral Symphony, completed in 1922, as an elegy to the dead of the war. In particular, in an often-quoted letter to his future wife Ursula Wood, he recalled that it grew out of his time as a medical orderly in France in 1916:

It is really war time music – a great deal of it incubated when I used to go up night after night in the ambulance wagon at Ecoiv[r]es & we went up a steep hill & there was a wonderful Corot-like landscape in the sunset – it’s not really Lambkins frisking at all as most people take for granted.[1]

Vaughan Williams served with the 2/4th London Field Ambulance, with which he was posted to France in June 1916. The following month it took over a sector of front in the chalk downland of Artois, where it was responsible for evacuating and treating the wounded. This unit was based at the village of Ecoivres, 4.2 miles behind the front line, where it operated a Main Dressing Station, bringing wounded each night from an Advanced Dressing Station.

Scheme for Evacuating Sick and Wounded from 60th Divisional Area (Provisional), 26 July 1916 (detail).[2]

Unlike villages closer to the front line, which were utterly destroyed after being retaken from the Germans during bitter fighting, Ecoivres was largely untouched. Its location close behind the lines made it valuable for billeting troops as well as housing medical and logistic units.

Graffiti left by British and Canadian soldiers on Ecoivres church still bears witness to its role during 1914-18.

The buildings used as the Main Dressing Station are today still the village school.

The Main Dressing Station was located in the former village school. On arrival in July, the officer commanding found it ‘full of sick & wounded not yet attended to or evacuated.’[3] Over the coming weeks, he expanded the facilities, obtaining the use of huts behind the school buildings.

This plan survives in the War Diary of the Canadian medical unit which took over running the Ecoivres Main Dressing Station later in 1916.[4]

The classroom on the right was the sick parade room, on the left was the Orderly Room.

Vaughan Williams’ work collecting wounded was to take him into the valley beneath the German-held Vimy Ridge. Already the scene of heavy fighting during the previous eighteen months, it had become known as ‘Zouave Valley’ after the bodies of French Algerian troops killed trying to take the ridge.

Scheme for Evacuating Sick and Wounded from 60th Divisional Area (Provisional), 26 July 1916.[5]

Each night, under cover of darkness, a convoy of motor ambulances collected the wounded from the Advanced Dressing Station and took them to the Ecoivres. Vaughan Williams described his experience of active service in a letter to his friend Gustav Holst:

I am very well & enjoy my work –  all parades & such things cease. I am ‘Wagon orderly’ and go up the line every night to bring back wounded & sick on a motor ambulance –  this all takes place at night –  except an occasional day journey for urgent cases. [6]

The observation afforded to the Germans by Vimy Ridge made it unsafe to take the motor ambulances across the valley in daylight. The steep hill he later recalled to Ursula was just outside Ecoivres and was followed by a descent into Zouave Valley.

The ambulance route from the MDS to the ADS, the view to the southeast, with the front line on Vimy Ridge to the left (Google Earth).

The devastation of shellfire was localised to the front line and recaptured areas, the area around Ecoivres and much of the journey up to the Advanced Dressing Station made by Vaughan Williams in the summer of 1916 was through countryside closely resembling how it looks today. This contrast, between the ugly destruction and human tragedy of war and the proximity of gentle unspoilt countryside, powerfully suggest themselves as the inspiration for the Pastoral Symphony.

The return journey to Ecoivres, with the ruined abbey of Mont St. Eloi a well-known landmark. (Google Earth).

The Advanced Dressing Station, near a dangerous crossroads known as Aux Rietz, was just over a mile from the front line and had to be located underground to protect against shellfire.

The underground Advanced Dressing Station at Aux Rietz, depicted just before it was taken over by the 2/4th London Field Ambulance.[7]

The site of the Aux Rietz Advanced Dressing Station, beneath the earth embankment on the right (Google Earth).

Today a vast French war cemetery, La nécropole nationale de Neuville-Saint-Vaast, is directly opposite the former location of the Advanced Dressing Station. In the above photograph, La Targette British Cemetery can also be seen in the distance beyond the French nécropole.

Plan of the headquarters buildings in Ecoivres, as taken over by 9th Canadian Field Ambulance in October 1916. [8]

The headquarters, stores and accommodation for the personnel of the 2/4th London Field Ambulance were also situated in Ecoivres, a little way up the main street from the school buildings in a large house which also still survives.

The house and outbuildings in Ecoivres used by the 2/4th London Field Ambulance in 1916.

Vaughan Williams’ memory of a bugler practicing during the war, which he echoed in a trumpet cadenza in his Pastoral Symphony, is sometimes said to have dated from his time at Ecoivres. In fact, he stated later, in a letter to the principal trumpet in the Hallé Orchestra, that he had heard this was while stationed at Bordon, training for the Artillery in 1918.[9]

The 2/4th London was relieved in October 1916 as part of the build-up of Canadian units for the assault and capture of the Vimy Ridge which occurred in April 1917. By this time, Vaughan Williams and the 2/4th London Field Ambulance were serving in Greece.

Further Reading

Stephen Connock, ‘The Edge of Beyond’, Journal of the Ralph Vaughan Williams Society, No. 16 October 1999. https://rvwsociety.com/wp-content/uploads/2016/07/rvw_journal_16.pdf

Contact me


[1] Hugh Cobbe (ed.), Letters of Ralph Vaughan Williams, 1895-1958, (Oxford, 2008), pp. 264-5.

[2] War Diary, Assistant Director Medical Services, 60th Division (UK National Archives WO 95/3026).

[3] War Diary, 2/4th London Field Ambulance (UK National Archives WO 95/ 3029).

[4] War Diary, 9th Canadian Field Ambulance (RG9-III-D-3, Library & Archives Canada https://recherche-collection-search.bac-lac.gc.ca/eng/home/record?app=fonandcol&IdNumber=2005074).

[5] War Diary, Assistant Director Medical Services, 60th Division, (UK National Archives WO 95/3026).

[6] Hugh Cobbe (ed.), Letters of Ralph Vaughan Williams, 1895-1958, (Oxford, 2008), p. 109.

[7] David Rorie, A medico’s luck in the war being reminiscences of R.A.M.C. work with the 51st (Highland) Division, (Aberdeen, 1929).

[8] War Diary, 9th Canadian Field Ambulance (RG9-III-D-3, Library & Archives Canada https://recherche-collection-search.bac-lac.gc.ca/eng/home/record?app=fonandcol&IdNumber=2005074).

[9] Letter to Arthur Butterworth, 25 May 1949, Hugh Cobbe (ed.), Letters of Ralph Vaughan Williams, 1895-1958, (Oxford, 2008), pp. 450-1.


Join me on a battlefield tour with The Cultural Experience:

Simon Jones Battlefield Tour Somme Poets 2019

The Battles of the Marne & the Aisne 1914 – 1918

First & Last Shots 1914 & 1918

Medics & Padres in the Great War

Walking Ypres 1914-1918

Walking the Somme, Summer 2023


John Nash Over the Top SimonJonesHistorian

‘It was in fact pure murder’: John Nash’s ‘Over the Top’


Vincent Faupier19698175Res

Who was Ivor Gurney’s ‘The Silent One’? The night attack by the 2/5th Glosters on 6-7 April 1917


Walking the Five Battles of Ypres, 28th September – 1st October 2018

Discover the most disputed battlefield of the Great War by walking the ground.  These six walks will enable both first-time and more experienced visitors to gain a deep understanding of the changing nature of the fighting, and the conditions endured.

Kemmel ypres battlefield tour

Mont Kemmel, from the 4th Ypres walk. (Simon Jones)

We explore the sacrifice of the ‘Old Contemptibles’ in 1914, the terrible first gas attacks of 1915, Passchendaele in 1917, and the dramatic ebb and flow of 1918.  Based in Ypres, the tour also includes an exploration of the history of this tragic yet beautiful town.  Traveller numbers are usually around a dozen, see The Cultural Experience website for full specifications including prices.  After travel by Eurostar from St. Pancras London to Lille, we are met by our vehicle and driver and keep travel time to the minimum.

Ypres Battlefield Walking tour Cloth Hall

The rebuilt Cloth Hall, St Martin’s Church and market square, Ypres.

Briefly occupied by the Germans in 1914, Ypres was desperately held by the Allies for four years.  Until the Allied advance in the final Fifth Battle, the Salient became a mass grave of first German and then British hopes of a breakthrough.  By walking the ground we discover the real human experience of the fighting, grasp the significance of the terrain, and understand the revolutionary changes in fighting methods during these five battles.

Ypres battlefield walking tour Gheluvelt shells

Shells at Gheluvelt (Simon Jones)

Day 1 – Ypres

Depart London St Pancras for Lille on the Eurostar arriving about midday.  This afternoon we walk the town of Ypres itself, see the Cathedral and Cloth Hall, and to hear of its remarkable survival and reconstruction.

We learn of the dangerous daily life of soldiers and a handful of civilians under fire, the soldiers’ canteen at ‘Little Toc H’, the Ramparts dressing station and cemetery, and the casemates which concealed the printing press of the ‘Wipers Times’.

Wipers Times Battlefield Tour

Day 2 – First and Second Ypres

This morning we follow the First Battle of Ypres during the autumn of 1914 and the desperate last push by the Germans following the ‘Race to the Sea’.

Gheluvelt Ypres Battlefield Walking Tour

The Worcesters aimed for Gheluvelt Church. (Simon Jones)

Starting at Black Watch Corner, we follow the Worcesters’ epic counterattack from Polygon Wood to Gheluvelt on 31st October 1914.

Worcesters Gheluvelt Ypres battlefield walking tour

The meeting of the 2nd Worcestershire with the 1st South Wales Borderers in the grounds of the Chateau, 31st October 1914 (J. P. Beadle).

Ypres Battlefield tour Gheluvelt

The rebuilt chateau at Gheluvelt which was the focus of the Worcesters’ counterattack (Simon Jones).

After lunch we turn to the Second Battle in the spring of 1915, following the first gas attack at Langemarck on 22nd April, from the German cemetery into the village.

Langemark Ypres Battlefield Walking Tour

Restored bunkers and a memorial wall in Langemark German Cemetery mark the front line from which chlorine gas was first used on 22nd April 1915 (Simon Jones).

We then look at the heroic stand by the Princess Patricia’s Canadian Light Infantry on Bellewaarde Ridge on 8th May and the German advance to Railway Wood.

PPCLI Ypres battlefield tour

The memorial to Princess Patricia’s Canadian Light Infantry with maple tree behind (Simon Jones).

In the evening we attend the moving Last Post ceremony at the Menin Gate before dinner.

Menin Gate Ypres Battlefield tour

The Missing of the Ypres Salient on the Menin Gate.

Day 3 – Third and Fourth Ypres

Meagher Tyne Cot Ypres battlefield walking tour

Lt. Norman Meagher was killed in the fighting for the ground on which Tyne Cot Cemetery now stands. (Simon Jones)

The Third Battle of Ypres, commonly known as Passchendaele, was one of the bloodiest and controversial of the war.  We start with the successful Australian attack at Broodseinde on 4th October 1917, following the advance up the ridge and the capture of the ground that became the vast Tyne Cot Cemetery.  When the Canadians took over the attack on Passchendaele, the fighting during November bogged down in the mud.

Passchendaele Ypres battlefield walking tour

A 1917 trench map and Passchendaele today.

In the afternoon we walk ‘Fourth Ypres’ with a short but steep ascent to follow the route of the German Alpine Corps in the rapid capture of Mont Kemmel during the Kaiser’s Offensive in April 1918.

Kemmel Ypres Battlefield Walking Tour

Mont Kemmel. (Simon Jones)

Day 4 – Fifth Ypres

The final battle of Ypres which opened on 28th September 1918 was part of the ‘Hundred Days’ which led to Allied victory on the Western Front.  Astonishingly, the whole Ypres Salient battlefield was re-captured in three days.  Exactly a century on, we focus on the capture by the 9th Scottish Division of the village of Ledeghem, today still dotted with concrete bunkers.

Ledegem bunker Ypres battlefield walking tour

The Ledegem bunker which we visit on the Fifth Ypres walk.

The war came full circle at Ledeghem: the cemetery contains the graves of cavalrymen who fell at the opening of the First Battle in October 1914.  Four years later, Second Lieutenant Gorle received the Victoria Cross for bringing his field guns to within 50 yards of the Germans, just as they had fought in 1914.

Gorle VC Ypres battlefield walking tour

Robert Gorle, who was awarded the VC for bravery at Ledegem, 1st October 1918.

Return to Lille for Eurostar back to London St Pancras.


I have been designing and guiding battlefield tours since 1997 and have taken well over a hundred groups to France, Belgium, Italy, Egypt, Libya, Britain, Canada and the USA. The Cultural Experience is a highly experienced tour operator which is ATOL Protected and a Travel Trust Association Member.

guided-historical-tours

Feedback from four of the travellers on my ‘Medics & Padres’ tour, August 2018:

It truly was the best and most informative tour we have been on.

It was a marvelous trip and gave us both new friends and a perspective on an aspect of the Great War of which we were ignorant.

Another excellent Great War tour… which was well-researched and presented.

I thoroughly enjoyed the trip and learned so much – thank you to you all for making it such a memorable few days.

Ypres Battlefield tour Ariane Hotel

‘Medics & Padres’ group in the private dining room of the Ariane Hotel, Ypres, August 2018.


Photo credit: Robert Gorle VC https://www.findagrave.com/memorial/8543779.


GE Birdcage offensive schemes3crop2

Myths of Messines: The Lost Mines


Vincent Faupier19698175Res

Who was Ivor Gurney’s ‘The Silent One’? The night attack by the 2/5th Glosters, 6-7 April 1917


1915: The First British Gas Masks

How the deadly effects of chlorine and phosgene gas were defeated by British scientists.  Researched using records in the UK National Archives and illustrated with exhibits from the Royal Engineers Museum, this two-part article ‘The First BEF Gas Respirators, 1915’ appeared in Military Illustrated, January & February 1991.

0102030405

See below for part two of the ‘First Gas Respirators, 1915.’


Join me on a battlefield tour with The Cultural Experience. We cut out delays at Dover by travelling via Eurostar from London St Pancras to meet our coach in Lille:

Simon Jones Battlefield Tour Somme Poets 2019

The Battles of the Marne & the Aisne 1914 – 1918

First & Last Shots 1914 & 1918

Medics & Padres in the Great War

Walking Ypres 1914-1918

Walking the Somme

More Information about Battlefield Tours


06070809


sawyer-spence

Understanding Chemical Warfare in the First World War


Edward Harrison

Edward Harrison, who gave his life to protect against poison gas


???????????????

Yellow Cross: Measures to protect against Mustard Gas


Contact

‘Pure murder’: John Nash’s ‘Over the Top’

Nash,_John_(RA)_-_'Over_The_Top'._1st_Artists'_Rifles_at_Marcoing,_30th_December_1917_-_Google_Art_Project-Res50

In John Nash’s painting ‘Over The Top’ 1st Artists’ Rifles at Marcoing, 30th December 1917, the artist depicted a disastrous attack in which he himself took part. A painting bereft of glory, it remains ‘an acknowledged masterpiece’ of war art.[1] When John Nash later contrasted his work as an official War Artist in two conflicts he described his paintings from the First World War as ‘the result of actual vivid experience’, whereas those from the Second, ‘were really more commissioned and hadn’t a very warlike aspect at all’. [2]

Study for Over the Top Art.IWM ART 3908 SimonJonesHistorian

The smaller of two studies by John Nash for ‘Over the Top’ in the Imperial War Museum, this was entitled ‘The Counter Attack’. © IWM (Art.IWM ART 3908)

Though not formally trained, Nash was a successful artist when he enlisted at the age of 23 as a private soldier in September 1916. He joined the Artists’ Rifles, although by this time, Nash recalled, there weren’t any other artists serving in the Regiment. He was posted to the Western Front in November.

John Nash service record SimonJonesHistorian

Part of John Nash’s enlistment document in the Artists Rifles, September 1915 (UK National Archives WO363).

Nash described the attack in 1974 to Joseph Darracott, Keeper of Art and Design History at the Imperial War Museum, both in a letter and during a long, recorded conversation but, by this time, as he himself acknowledged, his memories were uncertain.[3] Not all of his recollections correspond either with contemporary official records, or with accounts by two other members of the Artists Rifles dating from the 1930s, but it is still possible to clearly match the painting with the recorded events of the brief but disastrous action.

John Nash NPG x127172 detail SimonJonesHistorian

John Nash (seated on ground) as a Private soldier with a bombing section of the Artists Rifles, possibly the same section he commanded as a Corporal at the time of the attack (detail, National Portrait Gallery x127172, Creative Commons licence).

On 20th November 1917, a major British surprise attack with massed tanks made deep advances into the German positions south of Cambrai, only for much of the ground to be lost to a German counterattack ten days later. A month afterwards, on the southern part of the battlefield the Germans made a further limited attack against a vulnerable salient held by the Royal Naval Division called ‘Welsh Ridge’.[4] Beginning on Christmas Day, the Germans preceded the attack with heavy shelling which became intense at 6.30am on 30th December. Fifteen minutes later they attacked, the leading waves, dressed in white overalls, advancing over the snow in long lines in the morning mist. Equipped with flamethrowers, the attackers quickly gained a hold on the front positions in the north and centre.

The Artists Rifles, in reserve (part of the 190th Infantry Brigade of the Royal Naval Division) behind the northern part of the salient, were ordered up to the front line to make a counterattack, led by A and B Companies. This immediate and hasty assault, in daylight and without artillery support, aimedat ejecting the Germans before they had consolidated their gains and dislocating any further attempts to advance.

John Nash map Welsh Ridge SimonJonesHistorian

The Action at Welsh Ridge. The Artists’ Rifles attacked from the trench marked blue in a failed attempt to re-take Eagle Avenue. British-held trenches before the attack in red, dotted line shows the British front line at the end of the attack. German trenches not shown, German units in green. [Captain Wilfrid Miles, Military Operations France and Belgium 1917,vol. 3, (London, 1948)]

In ‘Over the Top’, British soldiers have just left a rough trench in which two men already lie dead, others fall after a few paces into no man’s land, the survivors plod fatalistically into no man’s land, their dark brown greatcoats contrasted with the white snow. In his letter to Darracott, Nash explained why he depicted the attack:

It was in fact pure murder and I was lucky to escape untouched. So you see I have very special memories as I was in charge of about fourteen men of the Bomber section… It was bitterly cold and we were easy targets against the snow and in daylight… I think the vivid memory of the occasion helped me when I painted the picture and provoked whatever intensity of feeling may be found in it… [5]

In an account of the attack published in the Artists’ Rifles Gazette in 1935, a sergeant of B Company, Reginald Lee, gave his reaction to Nash’s painting:

…the first time I saw it, …it immediately recalled in every detail the early morning scene at Welsh Ridge on December 30th 1917.[6]

Ordered to move forward to the make the attack ‘just before daybreak’, Lee described how the journey from the rear to the front line was rendered ‘very tedious and trying’ by the fatigue of the troops and the heavy German shelling. By the time his Company reached the front line, it was already Zero hour, about 11.15am, and the exhausted men:

had to jump out ‘Over the Top’ immediately on arrival. This is what you can actually see in Nash’s picture! The snow and mist; men of ‘B’ Company characterized by the blue square on the upper arm of their greatcoats; the sergeant with a Lewis Gun, already the sole survivor of his Lewis Gun section, and later a casualty himself.

John Nash Over the Top-Detail Sgt SimonJonesHistorian

Detail from ‘Over the Top’. A man falls hit, behind a Sergeant Lewis machine gunner, said by Reginald Lee to be the sole survivor of his section. The blue square indicated B Company of the Artists’ Rifles. © IWM (Art.IWM ART 1656)

Lee was on the right of the attack, with a platoon of about fifteen men; after about thirty yards, they walked into heavy German machine gun fire which especially caught the men on his left.

Nash, also in B Company, was a corporal in command of a section of Bombers, men trained in the use of grenades. He was probably to the left of Lee and his account also describes the heavy fire as they tried to cross no man’s land:

There was not a shot for a while, suddenly the Germans opened up and that seemed to be every machine gun in Europe.

Lee edged to the right, away from the fire, after about fifty yards he could see the German barbed wire, 25 yards ahead, and beyond that:

somewhat distinctly through the mist – I could see the heads and shoulders of the German troops. They commenced to fire at us with their rifles, and before we could get down they had caused further casualties including my Nos. 1 and 2 Lewis Gunners. The remainder of my platoon, now only four men – two of whom were wounded – and myself, took cover in a shell hole. From this spot we were able to be of some use with our rifles, as we were able to make the Germans keep their heads down.

Study for 'Over The Top' Art.IWM ART 3907-SimonJonesHistorian

The larger of two studies by Nash for ‘Over the Top’, both include barbed wire on iron pickets which was omitted from the final painting. © IWM (Art.IWM ART 3907)

Lee believed that, to their left, some men of A Company managed to get into the German front line. A private in A Company, Alfred Burrage, was not one of them:

We scrambled over somehow when the whistle went, and it was a relief if anything to get out of that dreadful pelting of shells. The air now was stung with all the queer and variegated sounds of bullets. In the middle distance we saw the heads of our enemies, and a German officer standing up as large as life directing fire.[7]

Burrage took cover in a sunken lane in no man’s land with a handful of others:

I crouched where I was for what seemed hours, not daring to show my head and suffering agonies of terror lest the Boche should walk over and murder what remained of us.

Eventually the survivors received orders to retire. To Burrage’s right, Nash, Lee and a few others of B Company, remained in the shell holes until it was dark when they were able to withdraw. Nash recalled:

We never got to grips with the enemy but were stopped in sight of them. We had to ‘hole up’ in craters and shell holes till nightfall and then got back to our original line.

The Brigade Major recorded in the War Diary that ‘the attack was doomed before it commenced’, owing to the ground being so well commanded by the Germans who were already firmly established in their captured trench.[8] The War Diary of the Artists’ Rifles recorded the casualties for the 30th – 31st December as about nine officers and 108 men.[9] Lee’s recollection was that, of 80 officers and men of B Company who had answered the roll that morning, just two sergeants and ten men returned. In an angry memoir published in 1930, entitled War is War, Burrage summed up the attack:

Of course we hadn’t a chance. We were the small cards in a game of bluff. The handful of us – A and B Companies – were tossed at the enemy as a tacit way of saying: “We can counter-attack, you see. We’ve got plenty of men. Don’t you dare come any further.”

Burrage described seeing John Nash among the survivors of B Company, ‘badly shaken and blackened all over with explosive’. He comments that shortly afterwards Nash went on leave and never returned as he obtained employment as an official War Artist.

John Nash Over the Top SimonJonesHistorian

John Nash, ‘Over The Top’. 1st Artists’ Rifles at Marcoing, 30th December 1917, © IWM (Art.IWM ART 1656)

Nash painted ‘Over the Top’ in June 1918 after he had been commissioned by the Ministry of Information, working alongside his brother Paul in a large shed in Chalfont St Peter in Buckinghamshire. Here John also painted ‘Oppy Wood, 1917’, while Paul began one of his most famous war paintings ‘The Menin Road’. All three paintings are today in the collections of the Imperial War Museum. [10]


Text © Simon Jones. See below for Notes to this article


Join me on a battlefield tour with The Cultural Experience:Simon Jones Battlefield Tour Somme Poets 2019

The Tank War 17th-20th May 2025

The Battles of the Marne and Aisne 6th-11th September 2025

Mons and Le Cateau 31st August – 3rd September 2025

More Information about Battlefield Tours


Vincent Faupier19698175Res

Who was Ivor Gurney’s ‘The Silent One’? The night attack by the 2/5th Glosters on 6-7 April 1917


Notes.

[1] Sir John Rothenstein, John Nash, (London, 1983), p. 51.

[2] Recorded conversation with J. C. Darracott [and D. Brown], 1974, Imperial War Museum Cat. 323. http://www.iwm.org.uk/collections/item/object/80000322

[3] Recorded conversation with J. C. Darracott, op. cit. Letter 15 January 1974 to Joseph Darracott, Keeper, Art and Design History, Imperial War Museum, quoted in Rothenstein, op. cit., p. 48.

[4] The 63rd (Royal Naval) Division was an infantry division formed in 1914, originally comprising many Royal Navy Reservists.

[5] Letter 15 January 1974 op. cit.

[6] Account by ‘R.A.L.’ (Reginald Alfred Lee), Artists’ Rifles Gazette, January 1935, p. 5, quoted and identified as Lee by Rothenstein, op. cit., and Patrick Baty, ‘Over the Top’, http://patrickbaty.co.uk/2017/12/16/over-the-top/ (accessed 30/12/2017).

[7] ‘Ex-Private X’ [A. M. Barrage], War is War, (London, 2010, originally published 1930), pp. 185-190.

[8] Captain C. H. Dowden, 190 Brigade War Diary, UK National Archives, WO95/3117.

[9] 1/28th (Artists Rifles) London Regiment War Diary, UK National Archives, WO95/3119.

[10] Letter 15 January 1974 op. cit.

URLs for IWM online catalogue:

‘Over the Top’ Art.IWM ART 1656

Sketch for ‘Over the Top’ Art.IWM ART 3907

Sketch for ‘Over the Top’ Art.IWM ART 3908

URL for NPG photograph x127172


The Gas Attack at Caporetto, 24th October 1917

The Battle of Caporetto (12th Battle of the Isonzo) was a German – Austro-Hungarian attack against the Italian positions on the Upper Isonzo (Soča) river. It was named after the town today known in Slovenian as Kobarid.

GE advances from PPTcr

The attackers achieved a break-in by twin advances along the valley floor to bypass the Italian front line defences. In the ensuing break-through and retreat, the Italians lost 14,000 square kilometres of territory, making the gas attack the most successful ever staged.

Celo Mt Svinjak Bovec valley P1000976

The Bovec valley from Austrian positions at Čelo (Simon Jones).

The Austro-Hungarian artillery used large numbers of gas shells to penetrate Italian artillery batteries in tunnelled mountainside emplacements. In addition, on the northern valley floor, the Germans used a new type of gas weapon to break the Italian front line positions at Bovec (Plezzo in Italian, Flitsch in German). A ravine immediately behind the Italian front, inaccessible to field artillery, was targeted with gas in the first German use of a weapon copied from the British.

P1000510

The German 18cm Projector showing how it was partly sunk into the ground, with projectile, seen in Kobarid Museum.

26 Gas min Caporetto

The German 18cm gas smooth-bore mortar bomb, an existing design employed with the gas projector. (From S.S. 420 Notes on German Shells, second edition, General Headquarters, 1918.)

Developed during the Somme, the British Livens projector was crude but highly effective, hurling cylinders of liquid gas from hundreds of steel tubes sunk into the ground. Its devastating effect persuaded the Germans to adopt a version of the weapon, the 18cm Gas Projector, with its first use at Caporetto.

Q 48449 German projectors Feb 1918

18cm Projectors laid out before being dug in, these photographs, apparently taken on the Western Front, show the same configuration as used on 24th October 1917. (IWM Q 48449).

After transportation difficulties on the narrow mountain roads, on 23rd October 1917 912 projectors were dug in about 130 metres behind the Austrian lines by the 35th Pioneer Battalion, a specialist gas warfare unit.[1]

Q 88120 German projectors

German gas pioneers installing firing charges in 18cm Projectors. (IWM Q 88120)

Q 29949

Installing the electrical cabling for the simultaneous firing of the 18cm Projectors. (IWM Q 29949)

The entrances to the gorge were targeted, with the bulk aimed at the gorge itself. Gas projectors were ideal for this position, which could only be reached by high trajectory weapons, and where the gas would form a dense concentration and penetrate many dugouts situated in the gorge. This use of the weapon mirrored one of the earliest uses of the Livens projector during the Battle of the Somme when the British fired gas into Y Ravine prior to the assault on Beaumont Hamel on 13th November 1916.

Seesselberg-419

The shoot plan for the projectors installed between Bovec to the north and the Soča (Isonzo) river to the south. From Friedrich Seesselberg, Der Stellungskrieg 1914-1918, (E S Mittler and Son, Berlin, 1926), p. 419.

The artillery gas bombardment began at 2am on 24th and the projectors were fired electrically five minutes later. The simultaneous discharge was accompanied by a sheet of flame and a loud explosion. In flight, the bombs emitted a trail of sparks and made a loud whirring noise, before bursting with a sharp detonation, producing a thick white cloud.[2]

Of the total installed, 894 could be made ready for firing, and 818 bombs hurtled into the gorge filling it with about 6.5 tonnes of phosgene gas.[3] Twenty-nine projector barrels burst and seven pioneers were affected by gas; 47 failed charges were fired 35 minutes later. The pioneers then attempted to re-lay the projectors and reload them with explosive bombs, but owing to the gas and barrel bursts, they were only able to fire 269, between 6.30am and 8.30am.

GE Seesselberg overlay2Crop

The shoot plan on a modern satellite photograph, showing the ravine behind the Italian lines targeted. (Simon Jones/GoogleEarth)

The Austro-Hungarian infantry attack was launched north of Bovec at 9am, seven hours after the gas attack. The gassed area to the south was assaulted by 140 Storm Troops from the 35th Pioneers. They encountered no resistance, just some weak machine gun fire from the far side of the Soča river.

The Pioneers found the ravine clear of phosgene but the dense concentration of highly poisonous gas had done its work perfectly. Just a few isolated Italians remained alive but badly injured. The rest of the garrison, 600-800 men, were all found dead. Only some had managed to put on their masks, after the bombs had landed amongst them. The rest were in attitudes indicating sudden death.

The absence of any resistance on the left flank of the Austrian attack enabled the whole Bovec valley to be taken with remarkable rapidity. The Italians had failed to create an in-depth defence and, within a few hours, the break-in developed into a break-through.

P1000908

A small cavern in the ravine in which the gas victims were caught is now a monument. (Simon Jones)

P1000901cr

P1000906

P1000903crop


References.

[1] This account is drawn from Rudolf Hanslian, Der Chemische Krieg, (E S Mittler & Sohn, Berlin, 1937), pp. 178-182. Hanslian cites as his sources Friedrich Seesselberg, Der Stellungskrieg 1914-1918, (E S Mittler and Son, Berlin, 1926) and W. Heydendorff, ‘Der Gaswerferangriff bei Flitsch am 24. Oktober 1917’ in Militärwissenschaftliche Mitteilungen, 65. Jahrgang, 1934.

[2] S.S. 420 Notes on German Shells (Second edition), General Headquarters, 1918, p. 454.

[3] Hanslian, p. 178 states that the projectiles for the 18cm Projector contained 12-15 litres of liquid gas but the British manual, S.S. 420 Notes on German Shells, second edition, (General Headquarters, 1918), reported from examination of the 18cm projectile that it contained 5.23 litres.


Join me on a battlefield tour with The Cultural Experience:

Simon Jones Battlefield Tour Somme Poets 2019

The War Poets: Words, Music and Landscapes, 10th-13th July 2023

First & Last Shots 1914 & 1918

Medics & Padres in the Great War

Walking Ypres 1914-1918

Walking the Somme, Summer 2023

More Information about Battlefield Tours


Slovenia P1000723

Trenches and Memorials on the Italian Front around Caporetto – 1


e4 105mm mustard

Yellow Cross: the advent of Mustard Gas in 1917


sawyer-spence

Understanding Chemical Warfare in the First World War


Who was Ivor Gurney’s ‘The Silent One’? The night attack by the 2/5th Glosters on 6-7 April 1917

Vincent Faupier19698175Res

© Vincent Faupier.

In Ivor Gurney’s poem about his experiences in the First World War ‘The Silent One’, the musician and poet describes a failed night time attack in which a non-commissioned officer is killed and left hanging on the uncut barbed wire. With the attack held up, Gurney is politely asked by an officer to try to get through a possible gap in the wire but, with equal politeness, he declines.

The poem has been described by his biographer as ‘this most truthful report from the battlefield’.[1] Although he was writing in the 1920s, the preciseness of the details suggest that Gurney was recalling an actual event.  In 2010, while I was guiding a group on a literature-themed tour of the Western Front, we visited the place where Gurney was wounded during an attack on the night of 6th – 7th April 1917 and we realised that this was clearly the event that Gurney was describing in ‘The Silent One’.[2]  It was one of many minor attacks made by the British as they pursued the German withdrawal from the Somme battlefield to the Hindenburg Line. Typically the Germans held positions for a few days, inflicting casualties with machine guns, before pulling back. The British attack had been planned for two days earlier only to be cancelled. Every such attack required soldiers to prepare themselves mentally for death or wounds and Gurney described his feelings to his friend Marion Scott:

           My state of mind is — fed up to the eyes; fear of not living to write music for England; no fear at all of death.

He hoped a ‘Nice Blighty’ would come soon, by which he meant a wound serious enough to require treatment in the UK.[3]  A fortnight after the attack had taken place, Gurney wrote again to Marion Scott, explaining that he was indeed ‘wounded: but not badly; perhaps not badly enough’ for he did not have a Blighty wound but was in hospital in Rouen.

           It was during an attack on Good Friday night that a bullet hit me and went clean through the right arm just underneath the shoulder…[4]

Guney Rouen May 1917 Gloucestershire Archives

Ivor Gurney in Rouen while recovering from the wound in his right arm received during the attack of 6- 7 April 1917. (The First World War Poetry Digital Archive, University of Oxford (www.oucs.ox.ac.uk/ww1lit); © The Ivor Gurney Archive, Gloucestershire Archives).

GBM-WO363-4-007407751-00204cropEnh

Part of Ivor Gurney’s service record showing the date of his wound on 7 April 1917, the abbreviation indicating ‘gunshot wound right arm’. (National Archives WO363 via Findmypast.com).

The attack was made by two battalions of Gurney’s Brigade. On the left was the 4th Battalion Oxfordshire and Buckinghamshire Light Infantry while on the right was Gurney’s battalion, the 2/5th Gloucestershire Regiment.  The Glosters (as they were known) attacked with two companies, Gurney’s B Company was on the left and C Company on the right. The 59th Division was also supposed to attack to the left of the Ox and Bucks.

GE street Vadancourt Cem Gurney3crop

The right of the position along which the 2/5th Glosters deployed for the attack on the night of 6th April 1917, about 1,000 yards from the German positions. Neither the farm nor the cemetery were there at the time. (GoogleEarth).

The Germans held trenches along high ground, protected in front by belts of barbed wire which were concealed from British observation by a depression. The speed of the German retreat left the British without maps of the German positions and this lack of information contributed to the failure of the attack.[5]  On the night of 6th, Good Friday, the attackers moved forward to a position about 1,000 yards from the German positions. The night was wet and very dark with no moon. Their orders were to deploy by 11pm and they will have lain down and waited for the British guns to open up.  Gurney’s B Company occupied a line about a third of a mile in width. 

TM 62c SE 2A 30011917crop3annotLabelscropArrow1

British Trench Map with the attack of 6th-7th April 1917 marked. This map, corrected to 30th January 1917, did not show the German trenches or wire; woods are also incorrectly plotted. (Map: McMaster University Creative Commons).

At midnight, the artillery began a forty-minute bombardment of the German positions, building to an intense fire for the final five minutes. The Brigade commander afterwards stated that the British shells fell short but there were no reports of any British casualties from this cause.  At 12.40am two companies from each of the two battalions rushed forward and the British guns advanced their targets by 100 yards every four minutes: this formed a ‘creeping barrage’ that the attackers were supposed to follow.

Lieutenant Brown, of the Ox and Bucks attacking to the left of Gurney’s Company, said that his men started ‘in quick time’; as they neared the German positions, they broke into a rush towards the wire and some were shouting. There were shouts heard also from the Germans and two or three were seen to climb out of their trenches and run away. But the attackers did not see the German wire until they were right on it: they found that the shelling had missed it, it was uncut, about ten yards deep and about five feet high.  The Germans at once targeted their wire with machine guns and grenades, in the darkness sparks flew where the bullets hit. Brown reported that his own light machine guns were unable to suppress the German fire; consulting with Gurney’s Glosters on his right, he found that they were also held up.

Gurney’s men too had found the wire uncut: Lieutenant Pakeman was reported in the Glosters’ War Diary to have:

rallied his men and made 3 efforts to get through, though himself wounded. He led his men up to the wire & cut a certain amount himself.

Pakeman was to be awarded the Military Cross for his part in the unsuccessful attack, the citation recording that:

He led his company in the most gallant manner and personally tried to cut gaps in the enemy’s wire. Later, although wounded, he remained at his post.

The War Diary also mentions that in C Company, Sergeant Davis ‘distinguished himself cutting a gap large enough for 5 men to get through. All of whom were killed.’ This man was Lance-Sergeant Frank Davis, awarded the Disguised Conduct Medal with the citation:

He led his platoon in the most gallant manner, and personally tried to cut a gap in the enemy’s wire. He was severely wounded.

GE street 11.50pm line towards German cem Gurney2

The area attacked by the Glosters. The German trenches were just beyond the crest line which is marked by trees on the right. The German wire was above and behind the area of trees in the middle ground (Cooker Quarry). The track is where the Glosters and Ox and Bucks withdrew before their second attempt to get through the wire. (GoogleEarth).

These attempts to get through the wire were fruitless and the two battalions withdrew to a partially sunken track to reorganise.[6] Brown again spoke to the commander of the Glosters’ B Company and they decided to make another attempt to get through the wire. Taking place at about 1.30am, this also failed and they withdrew to the track.  This withdrawal and failed second attempt is described by Gurney’s two final lines:

retreated and came on again,

Again retreated a second time, faced the screen.

Brown again conferred with the two Glosters company commanders and an officer of the 59th Division to his left: none had got through the wire and they decided to withdraw on the grounds that it appeared impossible.[7]

43849_3066_0-00665CropContr

2/5th Glosters War Diary entry for 7 April 1917. (National Archives, WO95/3066).

The 2/5th Glosters’ War Diary records that 15 men were killed from the battalion, and seven officers and 27 men wounded, including Lieutenant Pakeman. Six of the wounded were evacuated, one of whom will have been Gurney.[8]  The bodies of the dead, originally buried near to the German wire, were moved to Vadencourt British Cemetery in 1919.[9]

Vincent Faupier19698175Res

A German cemetery is now on the site of the German trenches attacked by the Glosters. This view looks back across the ground over which they advanced and shows the dead ground in front of the German positions which apparently prevented the artillery from bombarding the German wire. © Vincent Faupier.

The German resistance was part of a holding operation and when more British troops repeated the attack, on the night of the 8th – 9th April, the Germans were found to have withdrawn.  A study of this short battle suggests that Gurney’s recall of events was precise and accurate and that his capacity for intense self-examination provides valuable insights in respect of his admission of his refusal to attack and the way that this was apparently accepted by his superior officer. Such disobedience of an order in the face of the enemy could have resulted in Gurney receiving the death penalty. Instead, the incident appears to illustrate the circumstances whereby, in a heavily civilianised British army, officers preferred  to lead by example, rather than compelling their men to carry out a task that they themselves would not. It also suggests circumstances in which orders were a matter of negotiation where disobedience in certain situations would be accepted.

Two individuals are described in the poem. It is impossible definitely to identify the probable officer who unsuccessfully asks Gurney, with ‘the politest voice – a finicking accent’, whether he might find a way through but he may have been Lieutenant Pakeman, decorated for his part in the attack. In 1916, Sidney Arnold Pakeman was a history master at Marlborough College, having graduated from Sidney Sussex College, Cambridge. After the war he became Professor of History at the University of Ceylon and died in London in 1975.

It is possible to offer a more confident identification for the other soldier. The poet characterises him by his Buckinghamshire accent and his  non-commissioned officer’s stripes:

Silent One MS detail Gloucestershire Archives

The opening of ‘The Silent One’ from Gurney ‘Best Poems’ notebook. (The First World War Poetry Digital Archive, University of Oxford (www.oucs.ox.ac.uk/ww1lit); © The Ivor Gurney Archive, Gloucestershire Archives).

            The Silent One

Who died on the wires, and hung there, one of two  –

Who for his hours of life had chattered through

Infinite lovely chatter of Bucks accent:

Yet faced unbroken wires; stepped over, and went

A noble fool, faithful to his stripes  – and ended.

In April 1917 Gurney’s battalion still had a strong Gloucestershire identity and, of the fifteen killed in the attack, all but four were born or enlisted in the county or in Bristol.[10] None was strictly from Buckinghamshire but one, a corporal, was born in Long Marston, Hertfordshire, in an area closely enclosed on three sides by the boundary of Buckinghamshire. It was in the Bucks Herald newspaper that the parents of a dairy worker, Corporal James Chappin, placed two announcements on 26th April 1917:Bucks Herald April 28, 1917aCropEnh2cl

Bucks Herald April 28, 1917cropenh

The Bucks Herald, 26th April 1917 (via FindMyPast.co.uk).

DSCN3058cr

DSCN3059cr2

The grave of James Chappin in Vadancourt British Cemetery with the inscription chosen by his next of kin.

Headstone bearing inscription 'Ivor Gurney, Composer Poet of the Severn and Somme 1890 - 1937'.

The grave of Ivor Gurney in St Matthew’s Churchyard, Twigworth, Gloucestershire (Phillip Dutton).

Text © Simon Jones.  See below for Notes.


Join me on a battlefield tour with The Cultural Experience. We cut out delays at Dover by travelling via Eurostar from London St Pancras to meet our coach in Lille:

Simon Jones Battlefield Tour Somme Poets 2019

The War Poets: Words, Music and Landscapes, 6th-9th July 2023

First & Last Shots 1914 & 1918

Medics & Padres in the Great War

Walking Ypres 1914-1918

Walking the Somme, Summer 2023

More Information about Battlefield Tours


Notes.

[1] Michael Hurd, The Ordeal of Ivor Gurney, (Oxford, 1984), p. 203.

[2] My thanks to Mrs. Joyce Kendell for pointing out the resemblance.

[3] R. K. R. Thornton (ed.), Ivor Gurney War Letters, (London, 1984), pp. 152.

[4] Letter postmarked 14/4/1917, Ivor Gurney War Letters, op. cit., p. 154.

[5] The latest map found is Sheet 62cS.E. Edition 2A Trenches, corrected to 30/1/1917. Later maps (2nd February 1918) shows a series of fire trenches on the crest and forward slope which, if German, would have been there on Good Friday 1917. The positions of small woods are shown incorrectly on the earlier maps.

[6] Brown discovered that the 59th Division on his left had not attacked and its troops were crowding into his sector. See note below.

[7] A report by 184th Brigade states that a third attempt was also held up before the withdrawal was made. ‘Report on attack on German trenches on night 6/7th April, 1917′; ‘Report on Operations carried out by 184th Infantry Brigade from the time of taking over from 183rd Infantry Brigade to the time of relief by 35th Division’; Lieutenant K. E. Brown, (commanding A Company, 4th Battalion Oxfordshire and Buckinghamshire Infantry) ‘Report on attack on German trenches on 6/7th April 1917′, War Diary GS 184 Infantry Brigade, National Archives WO95/3063.

[8] War Diary, 2/5 Battalion Gloucestershire Regiment, National Archives, WO95/3066.

[9] CWGC Burial Return via CWGC.org.

[10] Soldiers Died in the Great War, (HMSO, 1921) digitised version searched via Ancestry.co.uk.

Photograph of Ivor Gurney in uniform and detail of ‘The Silent One’ ms are from the First World War Poetry Digital Archive, accessed April 3, 2017, http://ww1lit.nsms.ox.ac.uk/ww1lit/collections/item/6942, http://ww1lit.nsms.ox.ac.uk/ww1lit/collections/item/6931.


John Nash Over the Top SimonJonesHistorian

‘It was in fact pure murder’: John Nash’s ‘Over the Top’


P1100978 WP433resEnh

Where and How did Edward Brittain Die?


Edward HarrisonEdward Harrison, who gave his life to protect against poison gas


Contact Simon Jones

La mine Lochnagar

Traduction par Fanette Pocentek-Leroy. English version here.

Le cratère de la mine Lochnagar, qui a explosé à 7h28 le 1er Juillet 1916, près du village de la Boisselle, est une des traces les mieux connues et les plus dramatiques du champ de bataille de la Somme. Un gouffre béant, résultat d’une explosion massive au commencement de la bataille. Cet article explique comment et pourquoi la mine Lochnagar a explosé, qui sont les hommes qui l’ont creusée, quel effet elle a eu sur les Allemands, et si oui ou non elle a soutenu l’attaque.

IWM Q3999

Le cratère de la mine Lochnagar © IWM Q3999

Les Glory Hole

La guerre souterraine a commencé dans le secteur de la Boisselle le jour de Noël 1914. Le but de faire exploser une mine sous une position ennemie était de détruire une partie des défenses, mais en général les tunnels étaient stoppés sous le no man’s land par des contre-mines. Quand les Britanniques ont repris le secteur aux troupes françaises, le no man’s land était criblé de galeries de mine souterraines et la surface se formait d’une foule de larges cratères, car les deux côtés combattaient pour détruire les galeries de l’opposant en faisant exploser des charges toujours plus importantes.[1]

RIR111 (c) R. Whitehead

La ligne de front du 11ème Régiment d’Infanterie de Réserve allemand au ‘Glory Hole’, appelé ‘Granathof Stellung’ par les Allemands, 1915-16. ‘Tr’ Représente les cratères de mine dans le no man’s land. © Ralph Whitehead

 La 179ème compagnie de Tunneliers des Royal Engineers, compagnie britannique spécialisée, arriva dans le secteur en Août 1915 et trouva une domination des Allemands, avec un réseau de tunnels plus profond et plus étendu. Il s’en suivit une lutte désespérée pour contrôler le terrain sous le no man’s land et le secteur devint si marqué par les cratères de mines que les troupes britanniques le nommèrent le ‘Glory Hole’. En Octobre, quand la 185ème Compagnie de Tunneliers fut envoyée pour travailler avec la 179ème, ils avaient creusé jusqu’à la nappe phréatique à environ 30 mètres, mais les Allemands étaient descendus encore plus profondément.[2]

British and German mine systems at La Boisselle. (c) GoogleEarth and Simon Jones

Les systèmes de mine allemand et britannique à la Boisselle. © GoogleEarth et Simon Jones

Ni les Français ni les Britanniques n’avaient réussi à creuser un tunnel sous la ligne de front ennemie, mais les Allemands y étaient parvenus à plusieurs reprises, détruisant tranchées et abris et enterrant vivants soldats l’infanterie et le génie. Les Allemands avaient pris l’ascendant sous le no man’s land du front de l’Ouest et la réponse britannique a été de former avec des mineurs expérimentés des Compagnies de Tunneliers spécialisées. Les officiers étaient surtout des ingénieurs des mines et la 185ème était commandée par le Capitaine Thomas Richardson qui, quelques mois plus tôt, avait la charge de construire des systèmes d’égout à Rio de Janeiro.

Thomas Richardson

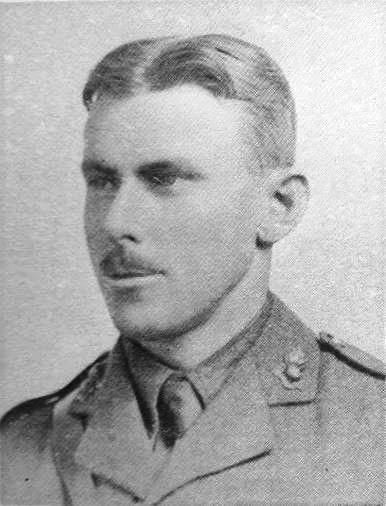
Thomas Richardson, premier commandant de la 185ème Compagnie de Tunneliers.

La Genèse de la mine Lochnagar

Le  11 Novembre 1915, dans une nouvelle tentative pour atteindre les tranchées allemandes, Richardson commença un nouveau tunnel loin de tout travail de minage allemand connu. Pour masquer l’entrée à la vue des Allemands, il le commença 120 mètres derrière sa propre ligne de front, dans une tranchée de communication appelée Lochnagar Street, mais pour pouvoir atteindre les lignes allemandes, il devrait courir sur une distance de presque 300 mètres.

Pour masquer encore davantage les travaux et les protéger des tirs d’obus et mortiers, Richardson fit d’abord creuser un puits vertical de 9 mètres et excaver une chambre. A partir de là, il démarra ce qui fut décrit comme « une galerie d’attaque principale » à une pente raide de 45°. Pour enlever les débris, il creusa une autre galerie en pente douce partant de la chambre jusqu’à un point plus de 30 mètres derrière. A la fin du mois, la galerie d’attaque avait avancé de 35 mètres et si elle avait été maintenue à une pente de 45°, elle aurait atteint une profondeur de 33 mètres. Ils avaient aussi commencé une autre galerie à 14 mètres de profondeur, avançant horizontalement vers les lignes allemandes, qui avait atteint une longueur de 16 mètres. Les mineurs progressaient dans les tunnels de 5 mètres maximum par jour, mais la vitesse de travail posait problème à l’infanterie pour dégager les débris. Pour chaque 30 centimètres creusés, environ 48 sacs de débris devaient être dégagés et au début du mois de Décembre, ils posèrent des rails pour faciliter l’excavation.[3] Richardson démarra aussi une troisième galerie vers les lignes allemandes en bifurquant de la galerie d’attaque principale à 29 mètres de profondeur. Comme la galerie à 14 mètres, elle était plus horizontale qu’inclinée.

joe-cox-and-tom-hodgettsres

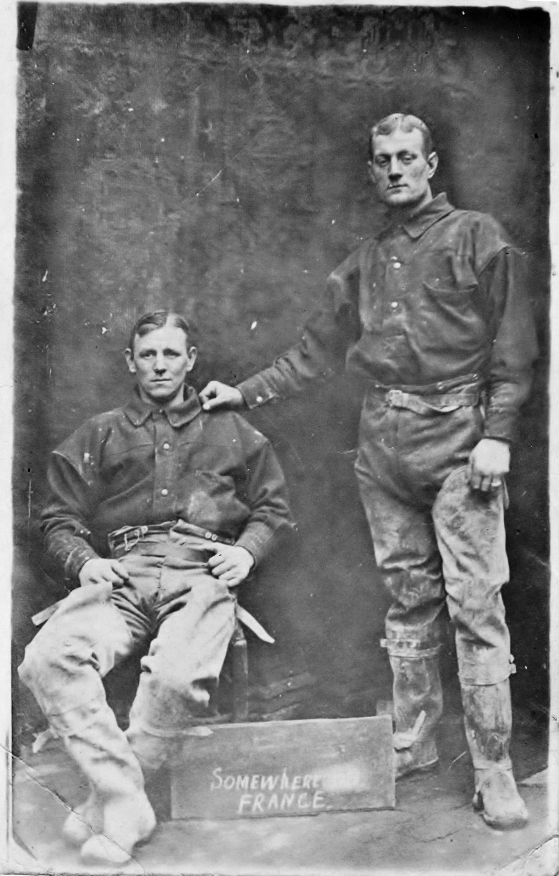
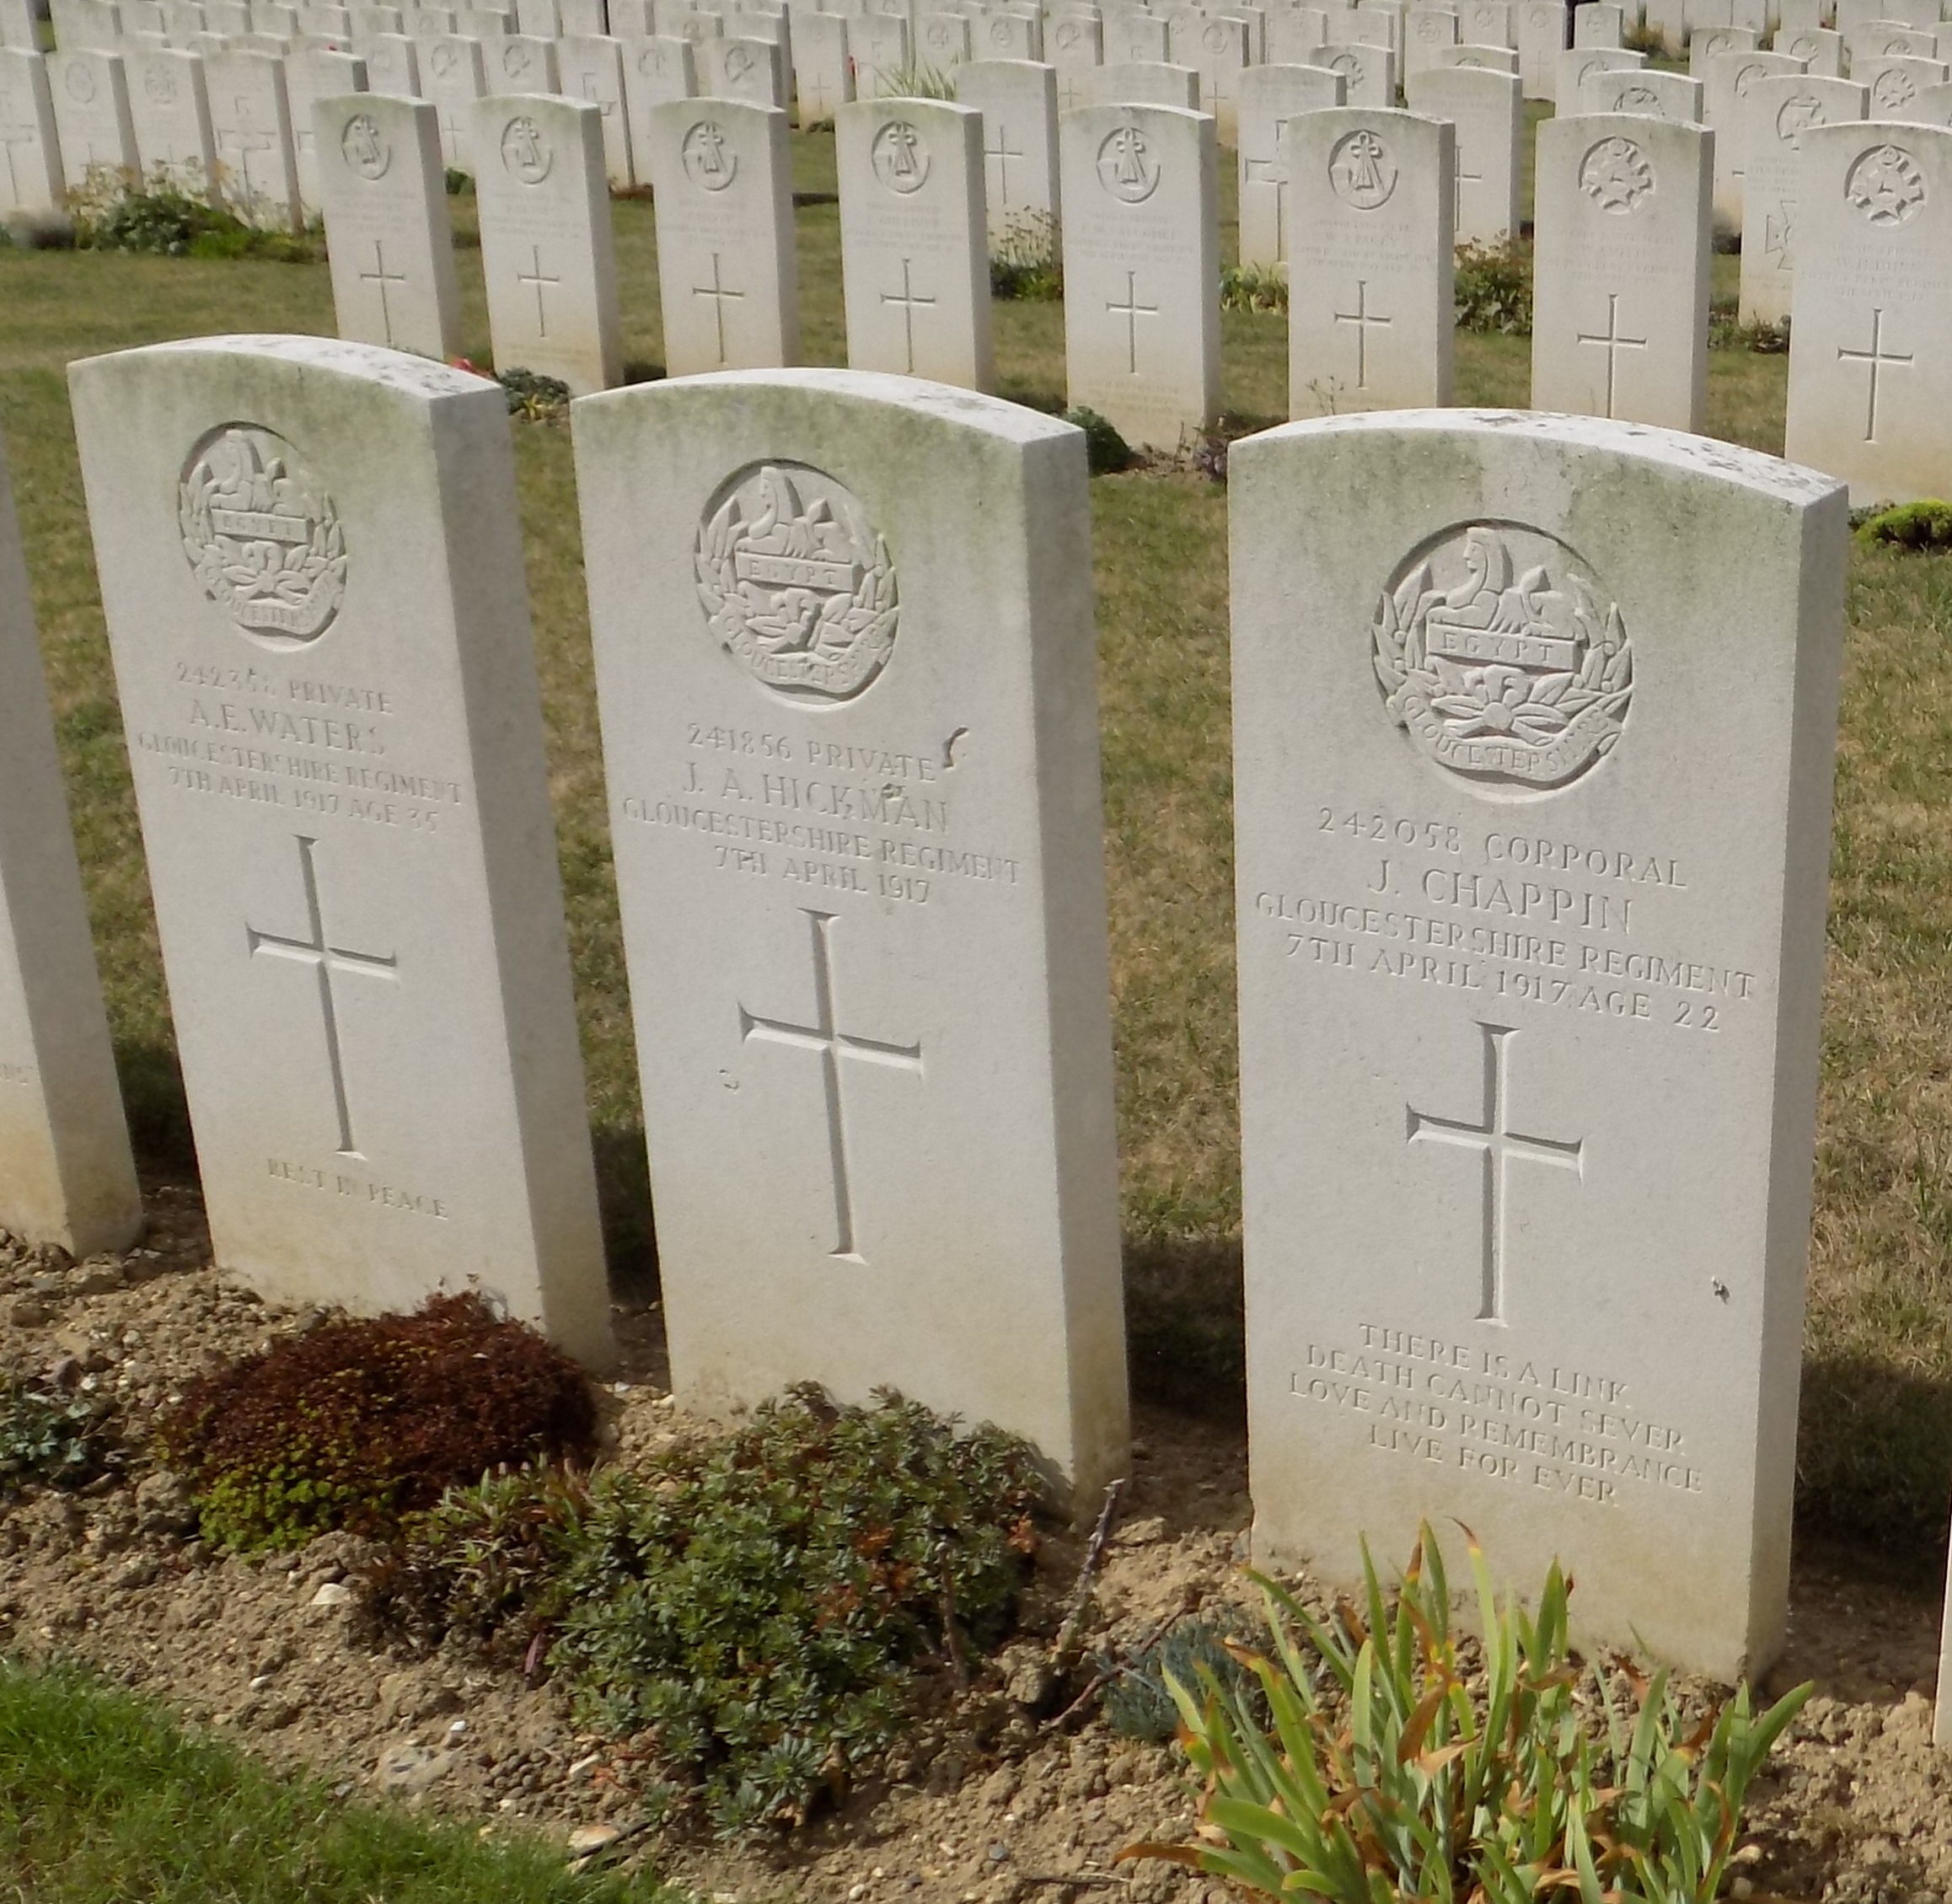
Joe Cox et Tom Hodgetts, mineurs de Shirebrook, Derbyshire, servant dans la 185ème Compagnie de Tunneliers, photographiés dans la Somme à Albert. Amis avant la guerre, seul Tom a survécu. © Duncan Hunting.

Aux niveaux les plus profonds, la craie était extrêmement dure et l’entrepreneur en ingénierie qui avait recruté les Compagnies de Tunneliers, John Norton-Griffiths, recommanda d’utiliser des piqueurs pneumatiques pour creuser les tunnels au niveau de la nappe phréatique, à entre 24 et 36 mètres de profondeur, pour attaquer les Allemands[4]. Richardson, cependant, n’utilisa pas de compresseur pour percer les tunnels Lochnagar mécaniquement, même s’il y en avait un installé dans le système bien plus étendu de Inch Street dans le Glory Hole. Des foreuses rotatives fonctionnant à l’air comprimé ne remportaient pas un franc succès et se bloquaient dans de petites poches de craie tendre,[5] alors que les perceuses à percussion pouvaient s’entendre de loin sous terre, prévenant l’ennemi de l’activité. Mais l’autre solution était aussi bruyante, puisqu’elle impliquait un grenaillage avec des explosifs placés dans des trous de 2,5cm percés à la main à la surface. La réverbération des détonations s’entendait clairement et était ressentie sur de longues distances sous terre, mais Richardson et ses opposants allemands avaient adopté le grenaillage comme seul moyen de progresser. Le Capitaine Henry Hance, qui commandait la 179ème Compagnie de Tunneliers, n’aimait pas cette méthode car il croyait qu’elle provoquerait l’ennemi et le préviendrait du travail des Britanniques, mais il n’avait pas d’autre choix que de l’adopter.

En janvier 1916, Richardson cessa le travail dans la galerie d’attaque principale, sans doute car elle était bien en dessous du niveau de l’eau et qu’elle nécessitait un pompage constant. Il poursuivit les galeries horizontales à 14 et 29 mètres et, comme le sol s’élevait vers les lignes allemandes, leurs profondeurs atteignirent lentement 15 et 30 mètres. Les raisons de Richardson de creuser des galeries à des niveaux différents ne sont pas très claires, mais elles lui permettaient d’écouter plus efficacement les contre-mines allemandes et lui permettaient aussi de masquer le bruit de la galerie la plus profonde avec un travail délibérément bruyant au niveau supérieur.[6]

Suspicions allemandes : le travail du silence

Le tas de débris des travaux du Lochnagar devint bientôt « une montagne colossale de craie blanche creusée dans les entrailles de la terre ».[7] Les Allemands pouvaient le voir sur des photographies aériennes et probablement aussi depuis leurs propres lignes, et commencèrent à le bombarder régulièrement. Tôt le 30 Janvier, les Allemands lancèrent un raid sur la ligne de front britannique au sud de la mine Lochnagar, capturant une douzaine d’hommes du Essex Regiment mais ils ne réussirent pas à atteindre l’entrée de la mine.[8] Ils eurent de la chance mais peu après, un désastre frappa le 185ème. Le 4 Février, alors que Richardson expérimentait un appareil d’écoute dans le système de Inch Street, les Allemands firent exploser une importante mine près d’une galerie britannique. Du méthane produit par l’explosion s’introduisit dans le système britannique et explosa, blessant grièvement Richardson et un autre officier. Le vide créé aspira du monoxyde de carbone, produit aussi par l’explosion, qui tua les deux officiers et seize mineurs.

Trois semaines plus tard, la 185ème Compagnie de Tunneliers fut envoyée sur un autre secteur au nord et la 179ème de Hance reprit ses travaux souterrains. A ce moment, la galerie Lochnagar supérieure était avancée sur 240 mètres, la galerie inférieure de 160 mètres. Hance stoppa le travail dans la galerie la plus profonde et continua seulement dans celle du dessus, qui était maintenant à moins de 60 mètres de la ligne de front allemande. Le danger d’être détecté était maintenant extrêmement présent. Ils arrêtaient souvent le travail pour écouter les bruits d’une contre-mine allemande, souvent pour de longues périodes, et le 8 mars, aucun son ne fut audible à l’oreille nue pendant 24 heures. A la fin de ce mois, la face du tunnel Lochnagar était à 43 mètres environ des Allemands et la 179ème devait essayer de travailler dans un silence complet pour que les Allemands ne les découvrent pas. Les bennes de débris poussées à la main étaient trop bruyantes, même si elles avaient des pneus en caoutchouc et couraient sur des rails en bois et, comme se souvient un des officiers, James Young, « à la fin, tout se faisait à la main ».[9] Le lieutenant Stanley Bullock décrit le sol comme de « la craie cassée », ce qui signifie qu’il était possible d’introduire une pointe de baïonnette dans les fissures à la surface, et Hance décrit les méthodes utilisées pour ne pas être entendus :

Tout se faisait en silence. Beaucoup de baïonnettes étaient montées sur des manches. L’opérateur insérait la pointe dans une fissure sur la « face », ou le long d’un silex, qu’on trouvait en grand nombre dans la craie, il la faisait tourner pour déloger un morceau de pierre de taille variable qu’il attrapait avec son autre main et posait sur le sol. Si, pour une raison ou une autre, il devait y mettre plus de force, un autre homme derrière lui attrapait la pierre dans sa chute. Les hommes travaillaient pieds nus, le sol de la galerie était tapissé de sacs de sable et un officier était toujours présent pour garder le silence. Quand les sacs se remplissaient, ils étaient passés le long de la ligne d’hommes assis sur le sol, et empilés contre le mur, près à être utilisés plus tard pour tasser.[10]

H M Hance

Henry M. Hance, commandant de la 179ème Compagnie de Tunneliers, photographié avant la guerre. © Mr J. Bennett et Simon Jones

Pour ventiler le long conduit, ils utilisaient de grands soufflets de forgeron connectés à un tuyau qui courait jusqu’à la surface de travail, mais l’air était quand même si pauvre que les bougies ne brûlaient qu’à l’endroit précis où l’air sortait du tuyau.[11] Ils réduisirent la taille de la galerie à environ 1,40m de haut sur 60 cm de large, réduisant l’excavation, mais les conditions étaient encore plus inconfortables. Hance se souvient :

Le travail était extrêmement laborieux, et si nous avancions de 45cm en 24 heures, nous pensions avoir bien travaillé.[12]

En fait, l’avancée moyenne pendant le mois de Mars tomba à 30cm par jour.[13]

Dans le système de Inch Street, les galeries des deux côtés étaient tellement proches sous le no man’s land qu’une irruption, décrite par Bullock comme « une des choses que nous redoutions », était attendue quotidiennement et finit par se produire le 10 Avril 1916.[14] Le capitaine Wilfred Creswick, en charge des travaux de Inch Street et de Lochnagar, entra dans une galerie ennemie mais les Allemands firent sauter une mine toute prête et il fut tué, avec deux autres mineurs travaillant à côté, et leurs corps ne furent jamais retrouvés. Creswick fut remplacé en tant que Commandant de Section par James Young, un dirigeant de houillère de Kilmarnock. Il devait être en charge de terminer, charger et faire exploser la mine Lochnagar. Le lendemain, les Allemands lancèrent une attaque sur la ligne de front au-dessus de la mine Lochnagar pour la seconde fois, capturant 29 soldats d’infanterie britanniques mais, encore une fois, ils n’allèrent pas jusqu’à l’entrée du tunnel. Le jour de l’attaque, Hance fut envoyé pour un congé prolongé dans un centre de repos à Marseille pour des raisons qui n’ont pas été précisées mais sans doute à cause de la fatigue, et il ne revint que le 7 juin. Jusque là, la 179ème fut sous le commandement du second, le capitaine Gilbert Rowan, un directeur de houillère de Fife. Ce fut une période de préparation cruciale pour l’offensive de la Somme.

Gilbert Rowan (c) Fiona Middlemiss

Gilbert Rowan, qui commanda la 179ème Compagnie de Tunneliers pendant une grande partie de la préparation de la Bataille de la Somme. © Fiona Middlemiss

Le tunnel Lochnagar était dirigé vers une position allemande appelée Schwabenhöhe, à partir de laquelle les Allemands avaient un large champ de tir contre les attaquants britanniques qui traversaient une zone appelée Sausage Valley. Hance décrit un objectif en trois parties :

(1) détruire la tranchée ennemie et renverser sa mitrailleuse à cet endroit, où sa tranchée forme un saillent proéminent (2) détruire son système souterrain quel qu’il soit (3) tuer les troupes qui pourraient être à l’abri sous terre pendant notre bombardement. [15]

A la mi-Avril, la 179ème divisa le tunnel pour viser deux points de la ligne de front allemande, avec l’intention de placer deux mines, à 75 mètres de distance, mais alors que les branches avançaient lentement, ils commencèrent à entendre les bruits des Allemands au-dessus, creusant en descendant de leur propre ligne de front. Les opérations de minage allemandes étaient menées par les troupes de Württemberg de la 1ère Compagnie de Réserve des 13ème Pionniers, commandés par le Lieutenant Sihler. Il devait suspecter une activité britannique car en Avril, alors qu’il avait commencé deux galeries d’écoute souterraine depuis Schwabenhöhe, le 22 on rapporta que des bruits avaient été entendus devant la partie sud et il commença trois tunnels de plus pour essayer de localiser la source. A la fin du mois, les deux plus proches des Britanniques étaient à environ 40 mètres mais, même si le plus au sud fut légèrement dévié vers le tunnel britannique, ils continuèrent tout droit, suggérant que Sihler n’avait pas trouvé sa localisation. A la mi-juin, les deux galeries de Sihler les plus proches du tunnel Lochnagar étaient descendues à 27 et 26 mètres, presque deux fois plus profond que les Britanniques.[16] « Jerry était très proche et en-dessous de nous » se souvient Young et, alors qu’ils travaillaient silencieusement dans le tunnel Lochnagar, les mineurs britanniques pouvaient entendre clairement les Allemands à l’oreille nue, dans une galerie descendant de leur ligne de front, « marchant lourdement dans leur pente » et aussi clairement au-dessus dans les abris.[17] Mais les bruits ne s’approchèrent pas plus. Sihler savait qu’ils étaient quelque part, mais pas où exactement.

L’approche de l’attaque sur la Somme

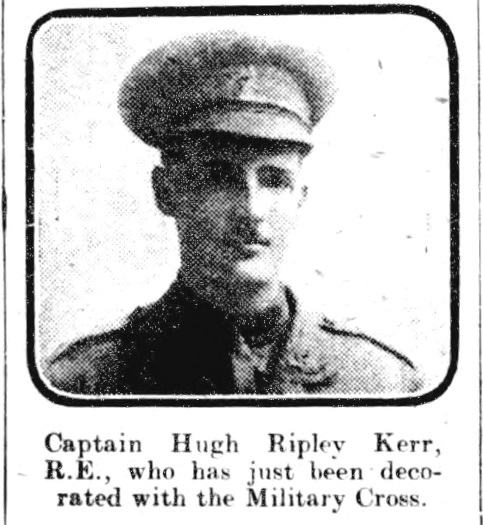
Pendant les mois d’Avril et Mai, Rowan a dû faire face à l’augmentation des demandes pour ses hommes, à l’approche de l’offensive sur la Somme. La 179ème était engagée sur une deuxième importante galerie de mine sur le flanc gauche du village de la Boisselle, dirigée vers une position allemande appelée Sape Y, qui devait être encore plus longue que le tunnel Lochnagar. Rowan avait aussi reçu l’ordre de creuser une série de tunnels peu profonds à travers le no man’s land, appelés ‘Sapes Russes’, non seulement à la Boisselle mais à l’opposé à Ovillers et au Nord à Thiepval, prévus pour des positions de mortier ou de mitrailleuse et pour permettre l’envoi de renfort quand la ligne de front allemande serait prise. L’un d’eux, appelé Kerriemuir, fut commencé en Avril à environ 120 mètres à gauche de la mine Lochnagar. Rowan avait dû retirer un quart de son effectif du système de tunnels du Glory Hole pour travailler sur les Sapes Russes et la détonation de mines au Glory Hole fut stoppée sauf en cas d’absolue nécessité.[18] Hugh Kerr, chargé du tunnel de la Sape Y, rend hommage aux hommes de la 179ème :

Les hommes faisaient un travail acharné – on n’a jamais vu des travailleurs pareils. Ils ont tout donné. Nous avions plus de 900 gaillards à la fois, environ 600 ou 700 soldats rattachés pour soulever les sacs de sable hors de là. [19]

Le 15 Mai, Rowan assista à une réunion au quartier général du IIIème Corps, où l’attaque à venir fut expliquée. Dix jours plus tard, il souffrit d’un retour d’un ulcère gastrique. Ce n’est que mi-Juin, quand le commandant de la 4ème Armée, le Général Rawlinson, donna les ordres pour l’attaque que le reste de la 179ème fut tout à fait informée. La pression du travail était aussi un indicateur pour les hommes et pendant la fin du mois de Mai et Juin, certains mineurs passèrent du statut de « tunnelier », payé 6 shillings par jour, à celui de « second tunnelier », payé 2 shillings et 2 pence, pour « inefficacité » ou « paresse », un coup important pour la fierté d’un mineur qui pouvait gagner bien plus chez lui. Le 19 Juin, un sergent déserta mais il lui fut ensuite permis de rejoindre les rangs.

La mine de la Sape Y atteignit son objectif sous la position allemande, aux dépends du travail silencieux, mais la progression au Lochnagar était si lente que le temps vint à manquer. Quand l’ordre d’opération de la 4ème Armée fut envoyé le 14 Juin, aucune des deux branches du Lochnagar n’avait atteint la ligne allemande, toutes les deux trop courtes d’au moins 30 mètres. Hance stoppa l’avancée des deux tunnels et commença à creuser les chambres pour contenir les explosifs. Pour compenser, il devrait « surcharger » les mines avec bien plus d’explosifs que nécessaire pour former simplement un cratère, pour envoyer un maximum de débris sur les tranchées allemandes : plutôt que de faire sauter les défenseurs, ils les enterreraient vivants. La surcharge permettrait aussi de former de hautes lèvres avec les débris comme barrière contre les tirs allemands sur les flancs, en particulier venant du village de la Boisselle à travers le no man’s land, et pour créer une hauteur depuis laquelle les attaquants pourraient observer et tirer sur les lignes allemandes. Mais il fallait pour cela que les attaquants atteignent les hautes lèvres avant les Allemands et les expériences précédentes avaient montré que les Allemands étaient plus rapides que les Britanniques pour prendre les bords des cratères, même pris par surprises.

Le plan de la 34ème Division pour prendre la zone lourdement fortifiée de la Boisselle reposait sur une attaque convergente qui envelopperait le village. Plutôt que d’aider cette attaque, les mines risquaient de la déranger, car l’infanterie devrait en attaquant passer d’un côté ou de l’autre des mines Lochnagar et de la Sape Y, laissant des espaces vides dans l’avancée. Le bataillon qui avait sur sa gauche la mine Lochnagar, les 10ème Lincoln (Grimsby Chums), devait retarder son avancée à cause de la nécessité de se retirer de leur ligne de front face au danger d’effondrement des tranchées et des retombées de débris. Le no man’s land était plus large à droite de la mine et cela signifiait qu’ils devaient traverser un espace encore plus grand. Quand le commandant de la brigade qui devait mener l’attaque à cet endroit (Brigadier-Général R.C. Gore, 101ème Brigade d’infanterie) briefa les officiers de son bataillon sur l’opération à venir, l’un d’eux, le Lieutenant-Colonel Urmiston, 15ème Royal Scots, objecta que la mine allait retarder l’avancée et laisser ses hommes vulnérables face aux tirs de mitrailleuses venant de la gauche quand les mitrailleurs allemands pourraient se concentrer entièrement sur son bataillon. Il proposa de changer de place avec les Lincoln, plus près de la mine, et d’affronter le risque des débris, si cela signifiait que toutes les unités pourraient avancer en même temps. Selon Urmiston, son offre fut refusée par le commandant de brigade qui se sentait incapable de modifier les décisions déjà prises par le haut commandement.[20]

L’heure de détonation des mines le 1er juillet 1916 devint controversée quand celle de Beaumont-Hamel sauta 10 minutes avant l’heure Zéro.[21] Cette erreur fatale donna non seulement aux Allemands un parfait avertissement de l’imminence de l’attaque mais elle bouleversa aussi l’heure cruciale pour la levée des barrages dans tout le secteur, enlevant à l’infanterie la protection de leurs propres armes pour que les troupes puissent essayer de prendre le cratère avant l’attaque principale. Cette proposition ne fut pas faite pour la Boisselle, où initialement la mine Lochnagar devait sauter une minute avant Zéro et la mine de la Sape Y à l’heure Zéro. En quelques jours, les ordres furent modifiés pour que Lochnagar saute deux minutes avant Zéro, puis que les deux mines sautent à cette heure.[22] Cette décision a sans doute été prise par précaution pour que les attaquants ne soient pas blessés par les retombées de débris et le danger d’un léger retard dans la détonation des mines. Deux minutes étaient en fait plus que convenables pour que les débris retombent mais cela demandait une coordination précise de la mise à feu de la mine et de l’avancée de l’infanterie. L’infanterie était impatiente de traverser le no man’s land dès que le barrage avancerait sur la ligne de défenses suivante, avant que les Allemands ne puissent ouvrir le feu, mais l’officier des mines dans les tranchées devait faire sauter la mine avec précision pour se synchroniser avec le barrage d’artillerie et l’attaque de l’infanterie. La décision sur l’heure n’aurait pas été celle de Hance même s’il a pu être consulté et s’il avait eu une opinion. Il avait reçu la Military Cross pour avoir chargé et fait sauté une mine le 15 Juin 1915 à Givenchy, qui avait tué un officier canadien et enterré d’autres attaquants. Quant à Lochnagar, elle fut surchargée parce qu’elle n’avait pas atteint la ligne allemande et la détonation eut lieu aussi deux minutes avant Zéro.[23]

Aerial PhotographRes

Photographie aérienne avec les mines allemande et britannique au sud du Glory Hole avant l’heure Zéro le 1er Juillet 1916.

Charger la mine

Quand Hance calcula la quantité d’explosifs nécessaires au Lochnagar et à la Sape Y, il n’avait jamais entendu parlé de quelqu’un d’autre ayant provoqué des explosions aussi importantes. Il allait placer 18,1 tonnes à la Sape Y et deux charges de 13,6 tonnes au Lochnagar. La branche gauche au Lochnagar était à peu près à 90° de la tranchée allemande, alors que la branche droite, plus longue, s’approchait à environ 45°. Il divisa donc les charges de manière inégale, mettant 10,9 tonnes du côté gauche et 16,3 tonnes dans la branche plus longue à droite. Les deux chambres n’étaient pas assez grandes pour les charges qui déborderaient dans les galeries jusqu’à la jonction et les charges formeraient un seul cratère massif. Les 27,2 tonnes combinées donneraient alors à la 179ème Compagnie de Tunneliers le record de la plus grosse mine détonnée par les Britanniques.[24] Au même moment, la 179ème ferait sauter deux charges de camouflet de 3,65 tonnes dans le système Inch Street pour détruire les galeries allemandes, portant à 52,6 tonnes le poids total devant être transporté sur la ligne de front et dans les tunnels.

Depuis le 5 Juin, la 179ème savait que l’attaque serait précédée de cinq jours de préparation d’artillerie et d’attaques au gaz, pendant lesquelles les tranchées devaient être aussi vides que possible. En plus du danger des tirs d’obus britanniques trop courts, les Allemands allaient sûrement répondre avec un contre-bombardement et il fallait terminer de charger les mines avant, même si la date n’avait pas encore été annoncée. Bullock décrit comment les explosifs pour la mine Lochnagar et les deux camouflets ont été amenés de nuit, dans des chariots tirés par des chevaux jusqu’à un château juste derrière les lignes à Bécourt, qui abritait aussi une unité médicale et le quartier général de la Brigade :

A la grande angoisse du commandant de Brigade, qui avait sûrement des raisons d’avoir peur puisque, si cela venait à exploser, ce qui était fort probable puisque les Allemands bombardaient fréquemment cet endroit, lui et son équipe et le poste de secours seraient tous envoyés tout là-haut.[25]

Chaque nuit pendant environ une semaine, des détachements d’infanterie transportaient plus de 1500 boites, chacune contenant 23 kilos d’ammonal, jusqu’à l’entrée des mines :

Moi ou un autre des Officiers Tunneliers devions toujours aller à la rencontre de ces détachements pour voir si le travail était accompli correctement et en même temps pour les guider à travers les tranchées. Comme on peut l’imaginer, ce n’était pas une tâche particulièrement appréciée par ceux concernés car, non seulement c’était un travail très pénible, parce que les tranchées à ce moment étaient humides et grasses, mais transporter des explosifs avec la probabilité d’obus vous tombant dessus n’était pas un travail particulièrement attirant non plus. Quand l’infanterie a eu fait ce travail pendant deux ou trois nuits, l’impression générale parmi eux était que nous rassemblions assez d’explosif pour faire sauter les Fritz jusqu’à Berlin.[26]

Les boites faisaient environ 30cm² et, selon l’un des Grimsby Chums, chaque homme d’infanterie devait en porter deux :

… nous transportions l’ammonal jusqu’à l’entrée d’un puits de mine, dans des boites en bois carrées, chacune contenant 23 kilos, deux attachées ensemble avec de fins morceaux de bois qui servaient de poignées. La première nuit nous étions dans une tranchée derrière le château, attendant l’ordre de s’éloigner, quand nous avons été surpris par une pluies de 5.9 et la quasi-débandade qui a suivi. Heureusement, ceux de devant se sont éloignés rapidement, et ceux de derrière n’ont pas perdu de temps à suivre. Les boites ont été transportées en un temps record ![27]

Pendant la journée, ils transvasaient l’ammonal dans des sacs en toile caoutchoutés pour le garder au sec pendant les deux semaines où il resterait dans la chambre. Chaque sac contenait environ 13,5 kilos et pour les charges du Lochnagar ils en remplirent 2000. Un tunnelier décrit le transvasement comme :

Un travail dangereux et déplaisant, la poussière d’ammonal tâchant tout ce qui entrait à son contact, dont les bras et les visages, un jaune violent et persistant.[28]

La charge de Lochnagar a été démarrée par le Capitaine James Young et le Lieutenant Ralph Fox et ils pensaient pouvoir faire la moitié du travail avant d’être relevés au bout de 48 heures. Ils n’utilisèrent pas les chariots à roue de peur d’alerter les Allemands et la quantité d’hommes nécessaire dévora bientôt tout l’oxygène disponible dans le tunnel exigu de 275 mètres. Quand Bullock et le sous-lieutenant Alexander McKay ont repris la place, ils n’ont trouvé qu’environ vingt sacs chargés. Plutôt que d’essayer de porter les sacs en bas du tunnel, ils ont organisé une chaine humaine sur toute la longueur, tandis que les officiers allaient chacun leur tour mettre en place les sacs dans les chambres et dans les branches de la galerie :

Nous avions décidé de nous occuper de ça le plus vite possible et nous avons chacun pris des tours de huit heure à la paroi avec des aller-retours réguliers dans le tunnel pour que l’infanterie continue de passer les sacs de l’un à l’autre à pleine vitesse. On ne pouvait y arriver qu’en espaçant les hommes d’1,80 mètres, réduisant ainsi la distance de portage pour chaque homme.[29]

Q115 IWM Collections

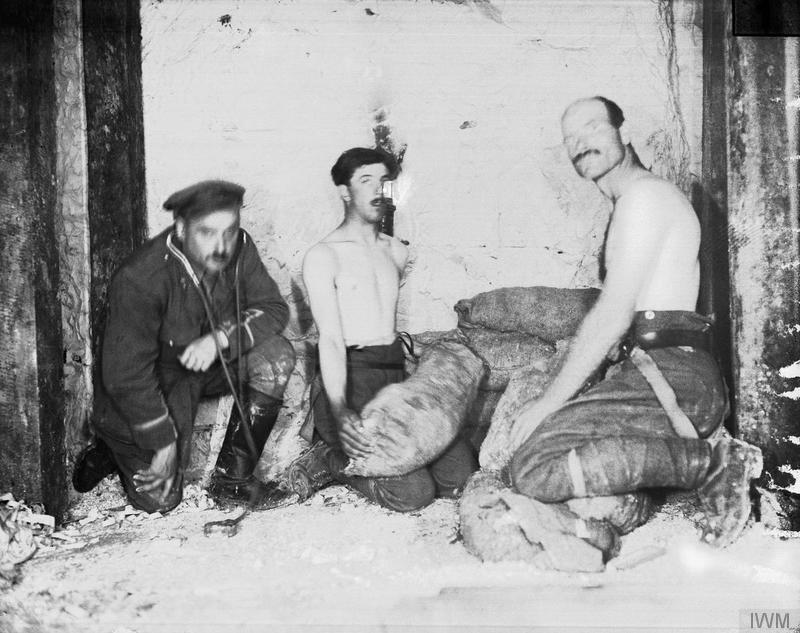
Sur cette photographie mise en scène, un officier tunnelier montre un appareil d’écoute géophone pendant que les mineurs semblent tasser une charge de mine. En réalité, le géophone était trop sensible pour être utilisé quand les hommes travaillaient à proximité. © IWM Q115

Pendant tout ce temps, ils avaient conscience des Allemands au-dessus et en-dessous mais, tant qu’ils pouvaient les entendre, ils savaient qu’ils n’allaient pas sauter. L’habitude des Allemands était d’arrêter le travail entre minuit et 7h : c’était dans cette période de silence que le risque de sauter était le plus grand, mais la 179ème ne pouvait pas arrêter le travail. A 7h, ils avaient chargé environ 400 sacs et attendaient avec anxiété que les Allemands reprennent. A la place, il n’y eut que le silence que Bullock trouva menaçant et terrifiant :

Nous pensions tous que les Boches devaient avoir compris ce que nous étions en train de faire, et nous nous attendions presque à ce que tout saute d’une minute à l’autre, la seule consolation étant que nous ne saurions pas ce qu’il s’était passé.[30]

Finalement, après une heure, les Allemands reprirent le travail comme d’habitude. Bullock ne comprit jamais la raison de ce retard. Plus tard ce matin-là, ils avaient chargé la moitié des explosifs et les détonateurs et les câbles étaient prêts à être placés dans les charges. Les deux charges de Lochnagar nécessitaient douze détonateurs, connectés en série, chacun inséré dans un apprêt en nitrocellulose, placés dans des sacs d’explosifs et enterrés régulièrement dans la charge, avec en plus un système complet de secours de douze autres détonateurs au cas où le premier échouerait. C’était la partie la plus dangereuse du travail, menée par les officiers dans les chambres, entourés de centaines de sacs d’explosifs. Bullock et McKay avaient inséré tous les détonateurs, connecté les câbles et chargé les deux chambres aux trois-quarts quand Young vint cet après-midi-là pour les relever. Il pensait vérifier que les détonateurs étaient correctement placés et que les câbles étaient bien connectés mais Bullock et McKay avaient travaillé bien plus vite qu’il ne s’y attendait – on peut sentir de la rivalité entre les équipes et les officiers – et Young n’eut pas d’autre choix que d’informer Hance que tout était en ordre. Le matin suivant, ils avaient terminé de charger et commencé à remblayer, ou tasser, le tunnel. Ils avaient stocké des centaines de sacs de craie le long de la galerie en prévision et les utilisèrent pour bloquer solidement le tunnel sur une centaine de mètres depuis l’embranchement.

Heure Zéro

Le 23 Juin, la 4ème Armée donna l’ordre de commencer le bombardement le jour suivant, amenant le jour Zéro au 29. Dans l’après-midi du 28 Juin, six officiers détachés par Hance pour faire sauter les quatre mines allèrent au quartier général de la 34ème Division pour recevoir leurs instructions pour l’attaque le jour suivant. La détonation de Lochnagar était à la charge de James Young et du sous-lieutenant Ralph Fox, Stanley Bullock et Alexander McKay devaient faire sauter les deux mines de Inch Street et la Sape Y serait mise à feu par le capitaine Hugh Kerr et le lieutenant Ralph Hawtrey. Ils apprirent que l’heure Zéro était fixée à 7h30 et qu’ils devaient faire sauter les quatre mines deux minutes avant. Ils réglèrent leurs montres ensemble au quartier général, qui avait été lui aussi synchronisé par d’autres soldats envoyés à chaque quartier général tout le long de la ligne d’attaque. A peine avaient-ils rejoint la ligne de front, après un long trajet à travers les tranchées encombrées de troupes se préparant à l’attaque, qu’ils reçurent l’ordre de revenir. L’heure Zéro avait été repoussée de deux jours, jusqu’au 1er juillet. Le mauvais temps avait empêché un bombardement précis des positions allemandes et des tirs plus longs étaient nécessaires.

Hawtrey, Young, Bullock 28 June 1916res

Ralph Hawtrey, James Young et Stanley Bullock, 179ème Compagnie de Tunneliers, à Albert le 28 Juin 1916, avant de partir pour la ligne de front pour le début de la Bataille de la Somme. Ralph Hawtrey fut tué au Bois des Fourcaux en Septembre. © Mrs A. Russell et Simon Jones.

Quand l’équipe de mise à feu s’avança pour la seconde fois, la riposte allemande avait commencé : les obus à shrapnells explosant dans les airs offraient « une des plus brillantes démonstrations de feux d’artifice » que Bullock eut jamais vue. [31]

Les câbles de mise à feu furent amenés jusqu’aux abris près de la ligne de front, où tôt le matin, les six officiers tunneliers étaient occupés à vérifier et revérifier les circuits de mise à feu en envoyant un faible courant à partir d’une batterie pour faire vibrer l’aiguille d’un galvanomètre. Même s’ils avaient utilisé des câbles doubles pour chaque mine, un bombardement soudain pouvait engendrer une cassure qu’il serait impossible de trouver et de réparer. Tous les efforts auraient été vains et les attaquants perdraient l’avantage que les mines promettaient. A 6h25, le bombardement britannique repris avec un regain d’intensité et de férocité.

Les hommes d’infanterie qui devaient attaquer près des deux mines avaient été prévenus de rester hors des abris instables, de faire attention aux retombées de débris et de s’attendre à des cratères de 140 mètres de diamètre. Une section entière de la ligne de front britannique qui débordait immédiatement sur la droite de l’endroit de l’explosion du Lochnagar fut évacuée par les 10ème Lincoln (Grimsby Chums) à cause du danger. Sur la gauche, chez les Tyneside Scottish quelqu’un dans la première vague cria à ses hommes cinq minutes avant Zéro : « MAINTENANT ! Accrochez-vous au parapet les gars, elle saute. »[32]

A l’opposé, principalement dans leurs abris et dans les caves de la Boisselle, les hommes de Baden du 110ème Régiment d’Infanterie de Réserve avaient enduré une semaine de souffrances à cause des explosions, de la soif et de la faim. Mais dans la plupart des cas, même si leurs tranchées étaient en ruine, les abris avaient tenu contre les obus britanniques et seulement au sud de Schwabenhöhe les lourds mortiers avaient provoqué des effondrements.

A 7h28, Stanley Bullock enfonça la poignée de son exploseur pour mettre à feu la première des mines de Inch Street. Après une très courte pause, il sentit le sol trembler sous ses pieds, quelques secondes plus tard une nouvelle secousse lui apprit que Young avait mis à feu Lochnagar avec succès :

Pendant l’attente qui s’ensuivit, avant que je ne sente la mine suivante exploser, il n’y eut aucune pensée pour les vies détruites et le matériel perdu quand des milliers de tonnes d’explosifs se sont volatilisés, seulement pour les ordres appliqués fidèlement. [33]

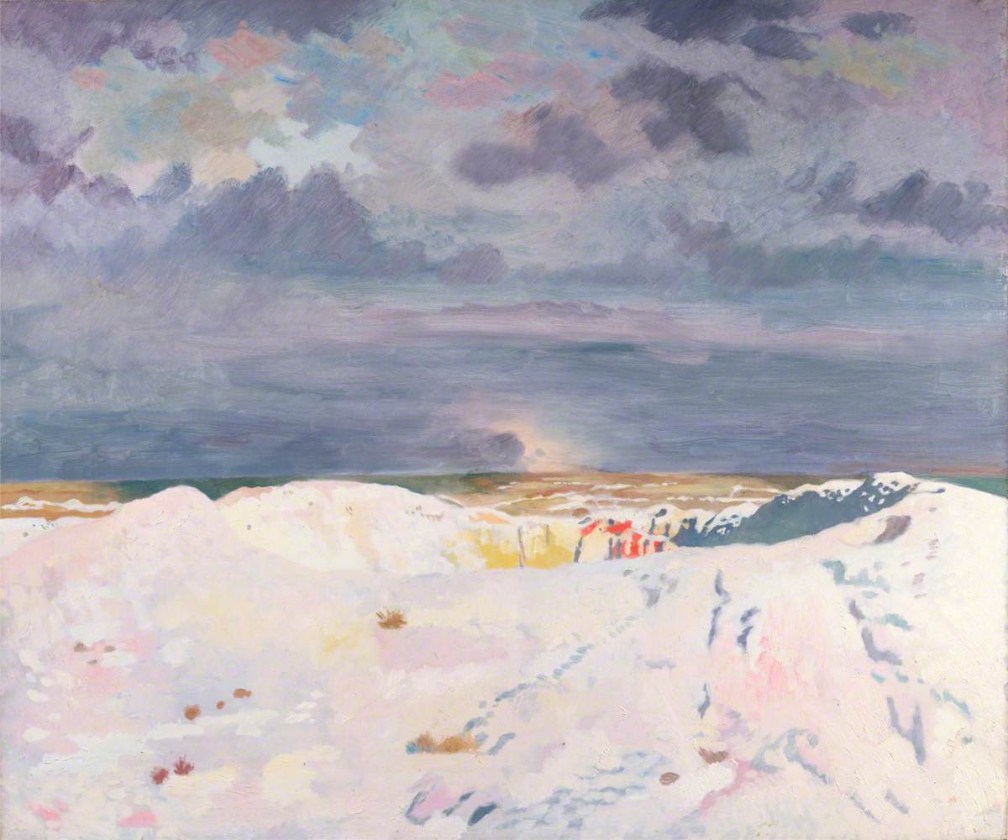
McKay a ensuite actionné son piston. Ils ne remarquèrent pas la Sape Y qui sautait mais Kerr la mit à feu avec succès. Sur le sol, les ondes de choc des mines furent bien plus ressenties qu’entendues, il n’y eut pas de détonation, que ce soit dans la Somme ou en Angleterre comme on le déclara bien plus tard,[34] mais 2500 mètres au-dessus du champ de bataille, les ondes acoustiques atteignirent un pilote qui avait été prévenu de rester loin de la Boisselle mais qui avait fait tourner sa machine pour observer les détonations de Lochnagar et de la Sape Y :

… la terre se souleva et éclata, une formidable et magnifique colonne s’éleva dans le ciel. Il y eut un grondement assourdissant, noyant tous les canons, jetant la machine de côté par les répercutions. La colonne de terre s’éleva, de plus en plus haut jusqu’à presque 1200 mètres. Là elle resta suspendue, ou sembla être suspendue, pour un moment dans les airs, comme la silhouette d’un grand cyprès, puis retomba en un cône de plus en plus large de débris et de poussière. Un instant après vint la seconde mine. A nouveau le grondement, la machine projetée, l’étrange silhouette désolée envahissant le ciel. Puis la poussière est retombée et nous avons pu voir les deux yeux blancs des cratères.[35]

© IWM (Art.IWM ART 2379)

‘The Great Mine, La Boisselle’, par William Orpen, 1917. © IWM (Art.IWM ART 2379)

Un officier du 3ème Tyneside Scottish, dans la seconde vague sur la gauche de la mine Lochnagar, était exalté :

… nous avons été témoins du spectacle le plus merveilleux. Une énorme colonne de craie a été envoyée à plusieurs centaines de mètres dans les airs et est retombée dans une belle cascade blanche.[36]

Un des Grimsby Chums a décrit ‘tout le sol autour ondulant et se balançant comme pendant un tremblement de terre’ et un autre, qui appuyait sa jambe contre la tranchée, a eu le membre cassé par l’onde de choc.[37] Ils ont senti le sol onduler trois fois et ils ont vu une couche de terre se soulever et dans son sein l’explosion d’un noyau ambré :

De gros blocs de terre, grands comme des wagons de charbon, furent soufflés vers le ciel pour foncer et rouler et puis commencer à fuser tout autour de nous. Un grand geyser de boue, de craie et de flamme s’était élevé et s’affaissait devant nos yeux.[38]

Un autre compare l’ondulation du sol au plateau d’une balance :

En regardant par-dessus le parapet, on pouvait voir un mur immense s’élever jusqu’à 90 mètres, composé de craie, de boue, de poussière, d’étais, etc… avec ici et là un Allemand.[39]

LEAD Technologies Inc. V1.01

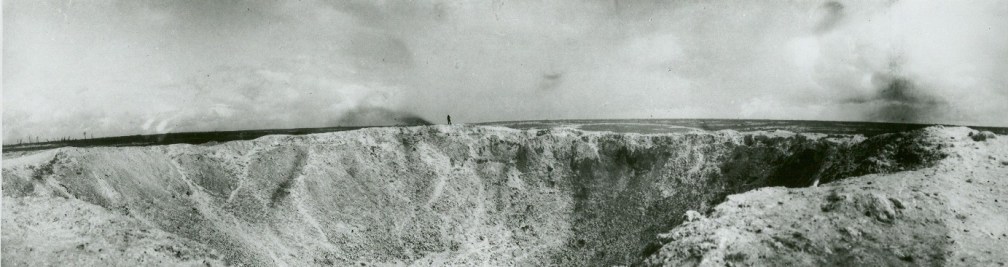
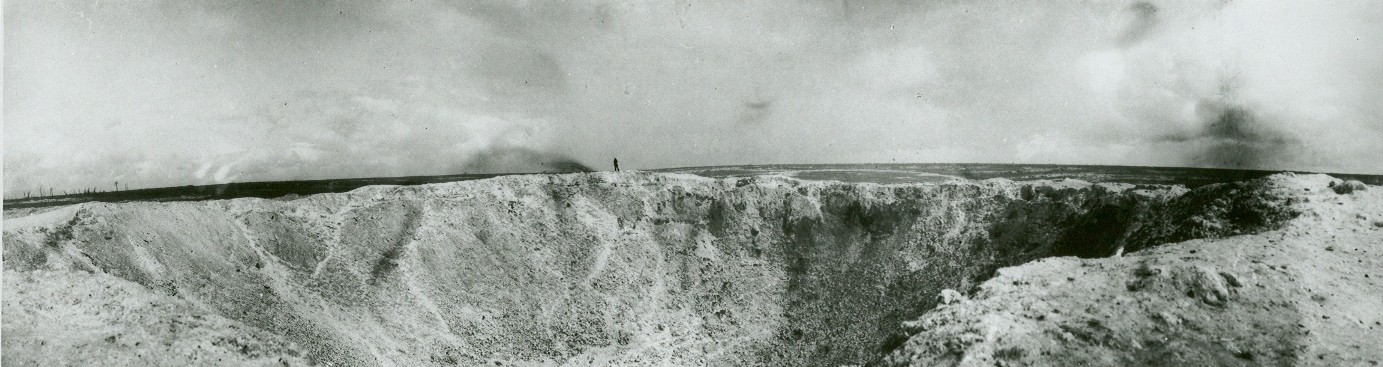
Le cratère Lochnagar, peu après l’explosion, montrant la localisation des deux charges. Tiré de ‘the Work of the Royal Engineers in the European War, 1914-19’. Military Mining (Chatham, 1922).

La mine Lochnagar projeta jusqu’à 84 000 tonnes de terre et de craie et laissa un cratère de 67 mètres de diamètre et 17 mètres de profondeur.[40] Les débris enterrèrent 180 mètres de ligne de front allemande et l’infanterie de Baden dans les abris n’avait aucune chance : certains furent instantanément désintégrés, certains projetés dans les airs, écrasés ou mourraient lentement prisonniers 10 mètres sous terre. A la Sape Y, la mine détruisit complètement la position avancée allemande, laissant un cratère aux lèvres hautes de 40 mètres de large mais, ayant repéré les Britanniques qui creusaient sous eux, les Allemands s’étaient retirés de cette position avancée et ne subirent aucune perte.

Deux minutes après l’explosion des mines arriva l’heure Zéro. Alors que les canons britanniques levaient les tirs sur la ligne de front allemande pour une position plus en arrière, 4000 soldats britanniques lourdement chargés grimpèrent hors de leurs tranchées et commencèrent à marcher à travers les champs foisonnants du no man’s land, pendant que, derrière eux, 4000 autres déferlaient. Bientôt d’autres avanceraient, car le commandant de la 34ème Division avait déployé ses 12000 hommes d’infanterie tous ensemble contre la Boisselle.

A part autour de la mine Lochnagar et au sud de Schwabenhöhe, les profonds abris allemands avaient tenu face au bombardement britannique. Les explosions de mine et la levée du barrage britannique alerta les hommes d’infanterie de Baden sur l’imminence de l’attaque longtemps attendue. Les survivants émergèrent des abris avec des mitrailleuses et des fusils pour ouvrir le feu sur les rangs de soldats avançant en lignes ordonnées à travers les herbes hautes et balayant les pentes en colonnes. Deux minutes après leur départ, les premiers attaquants furent frappés par les tirs de mitrailleuses et de fusils allemands. Nombre des Grimsby Chums et du 11ème Suffolk furent touchés avant même d’avoir dépassé leur propre ligne de front, ayant été reculés pour éviter les débris de la mine Lochnagar. La vitesse d’avancée avait été minutieusement réglée pour rester derrière le barrage de défense britannique mais alors que les hommes de devant fléchissaient, les suivants les rattrapèrent et les hommes regroupés formaient des cibles parfaites. En dix minutes, quatre-vingt pour cent des bataillons de tête furent touchés. Les pertes subies par la 34ème Division à la Boisselle furent les pires de toutes pour le 1er Juillet 1916.[41] Urmiston avait raison sur sa prédiction d’un feu allemand important, mais il fut enduré par tous les bataillons à l’attaque. Cependant, la mine Lochnagar détruisit avec succès une partie de la ligne de front allemande. La destruction permit aux attaquant de pénétrer la ligne de front allemande et de la dépasser jusqu’à ce que, sous la contre-attaque, ils soient obligés de reculer jusqu’à la zone du cratère.[42] Dans son rapport sur la mine, Hance déclara que la mine avait été bénéfique pour les attaquants en causant « des pertes considérables » aux Allemands et que :

par la violence du choc sur sa garnison, et l’abri offert par les lèvres même du cratère, elle avait permis à notre infanterie à l’attaque d’atteindre ses tranchées ici, et de les dépasser dans un premier assaut, avec relativement peu de pertes. Les pertes ainsi subies avait dû être causées par un feu sur les flancs. L’infanterie devait aussi cette nuit-là s’installer dans le cratère, formant une position avancée devant nos tranchées de départ.[43]

Attack of 34th Division (Official History)

L’attaque de la 34ème Division le 1er Juillet 1916 (British Official History).

La Sape Russe Kerriemuir avait été prévue pour permettre le réapprovisionnement de la ligne de front capturée dans le cas de cette éventualité. La nuit avant Zéro, la 179ème était supposée avoir préparé le tunnel avec seulement 60cm de couverture laissée avant d’atteindre la surface, aux trois-quarts du no man’s land. Le travail final pour l’ouvrir juste après l’explosion des mines revint à la charge d’un peloton des 18ème Northumberland Fusiliers Pioneers sous le commandement du lieutenant John Nixon. Le soir du 30 Juin, cependant, Nixon fut choqué d’apprendre que ses hommes devraient creuser à travers 3,5 mètres de craie pour ouvrir le tunnel, une journée entière de travail. Ils commencèrent donc le travail à minuit et réussirent à ouvrir le tunnel Kerriemuir une heure avant Zéro, et il fut utilisé plus tard dans l’après-midi pour envoyer des hommes pour renforcer la ligne allemande capturée au Schwabenhöhe (il n’était pas, comme on le dira plus tard, relié au cratère de mine de Lochnagar).[44]

Q 49394

Un tumulus au fond du cratère Lochnagar, Septembre 1917. © IWM Q49394

Même si la mine Lochnagar a apporté de l’aide lors de l’attaque britannique, les pertes allemandes causées par l’explosion ont été l’objet de déclarations confuses et exagérées du côté britannique. L’inspecteur des mines du GQG, le brigadier-général R.N. Harvey, se rendit sur place une semaine après l’attaque et parla aux officiers de la 179ème qui étaient en service. Il décrira plus tard les effets que la mine Lochnagar avait eu, croyait-on, sur les Allemands :

Nous avons estimé avoir enseveli 9 abris profonds, chacun avec un officier et 35 hommes – car des prisonniers ont été pris dans l’abri suivant, ils étaient tous prêts à partir et l’officier a dit qu’il y avait 9 autres abris avec le même nombre d’occupants, soit 9 x 1 officier et 35 hommes – 9 officiers et 315 hommes. En résultat, nos troupes sont passées avec peu de pertes.[45]

L’histoire officielle britannique a attribué à tort la déclaration de Harvey à la mine de la Sape Y plutôt qu’au Lochnagar, mais ni l’estimation d’Harvey des pertes allemandes ni sa déclaration de pertes légères pour les attaquants ne sont appuyées par les preuves et il n’y a aucune archive d’une tentative britannique de mettre au jour des abris allemands effondrés ou détruits par la mine.[46] Les archives allemandes montrent qu’en aucun cas un nombre d’hommes tel que celui avancé par Harvey ne tenait la ligne de front désignée, qui faisait partie du secteur de la 5ème Compagnie du 110ème Régiment d’Infanterie de Réserve. Une analyse des rapports de pertes montre que cette compagnie a subi 109 pertes entre le 27 juin et le 3 juillet, dont 35 rapportés tués ou disparus (tués) le 1er juillet.[47] Il est donc possible que la garnison d’un abri allemand tout au plus ait été perdue suite à l’explosion de la mine Lochnagar.

La Boisselle tomba aux mains des Britanniques le 4 Juillet, mais James Young ne vit jamais le cratère de la mine Lochnagar avant d’être blessé le 8 Juillet. Il survécut à la guerre et mourut en 1949.

Après le remblayage dans les années 70 du cratère de la Sape Y, l’anglais Richard Dunning acheta le cratère pour assurer sa préservation, pour laquelle œuvrent aujourd’hui les Amis de Lochnagar.

OLYMPUS DIGITAL CAMERA

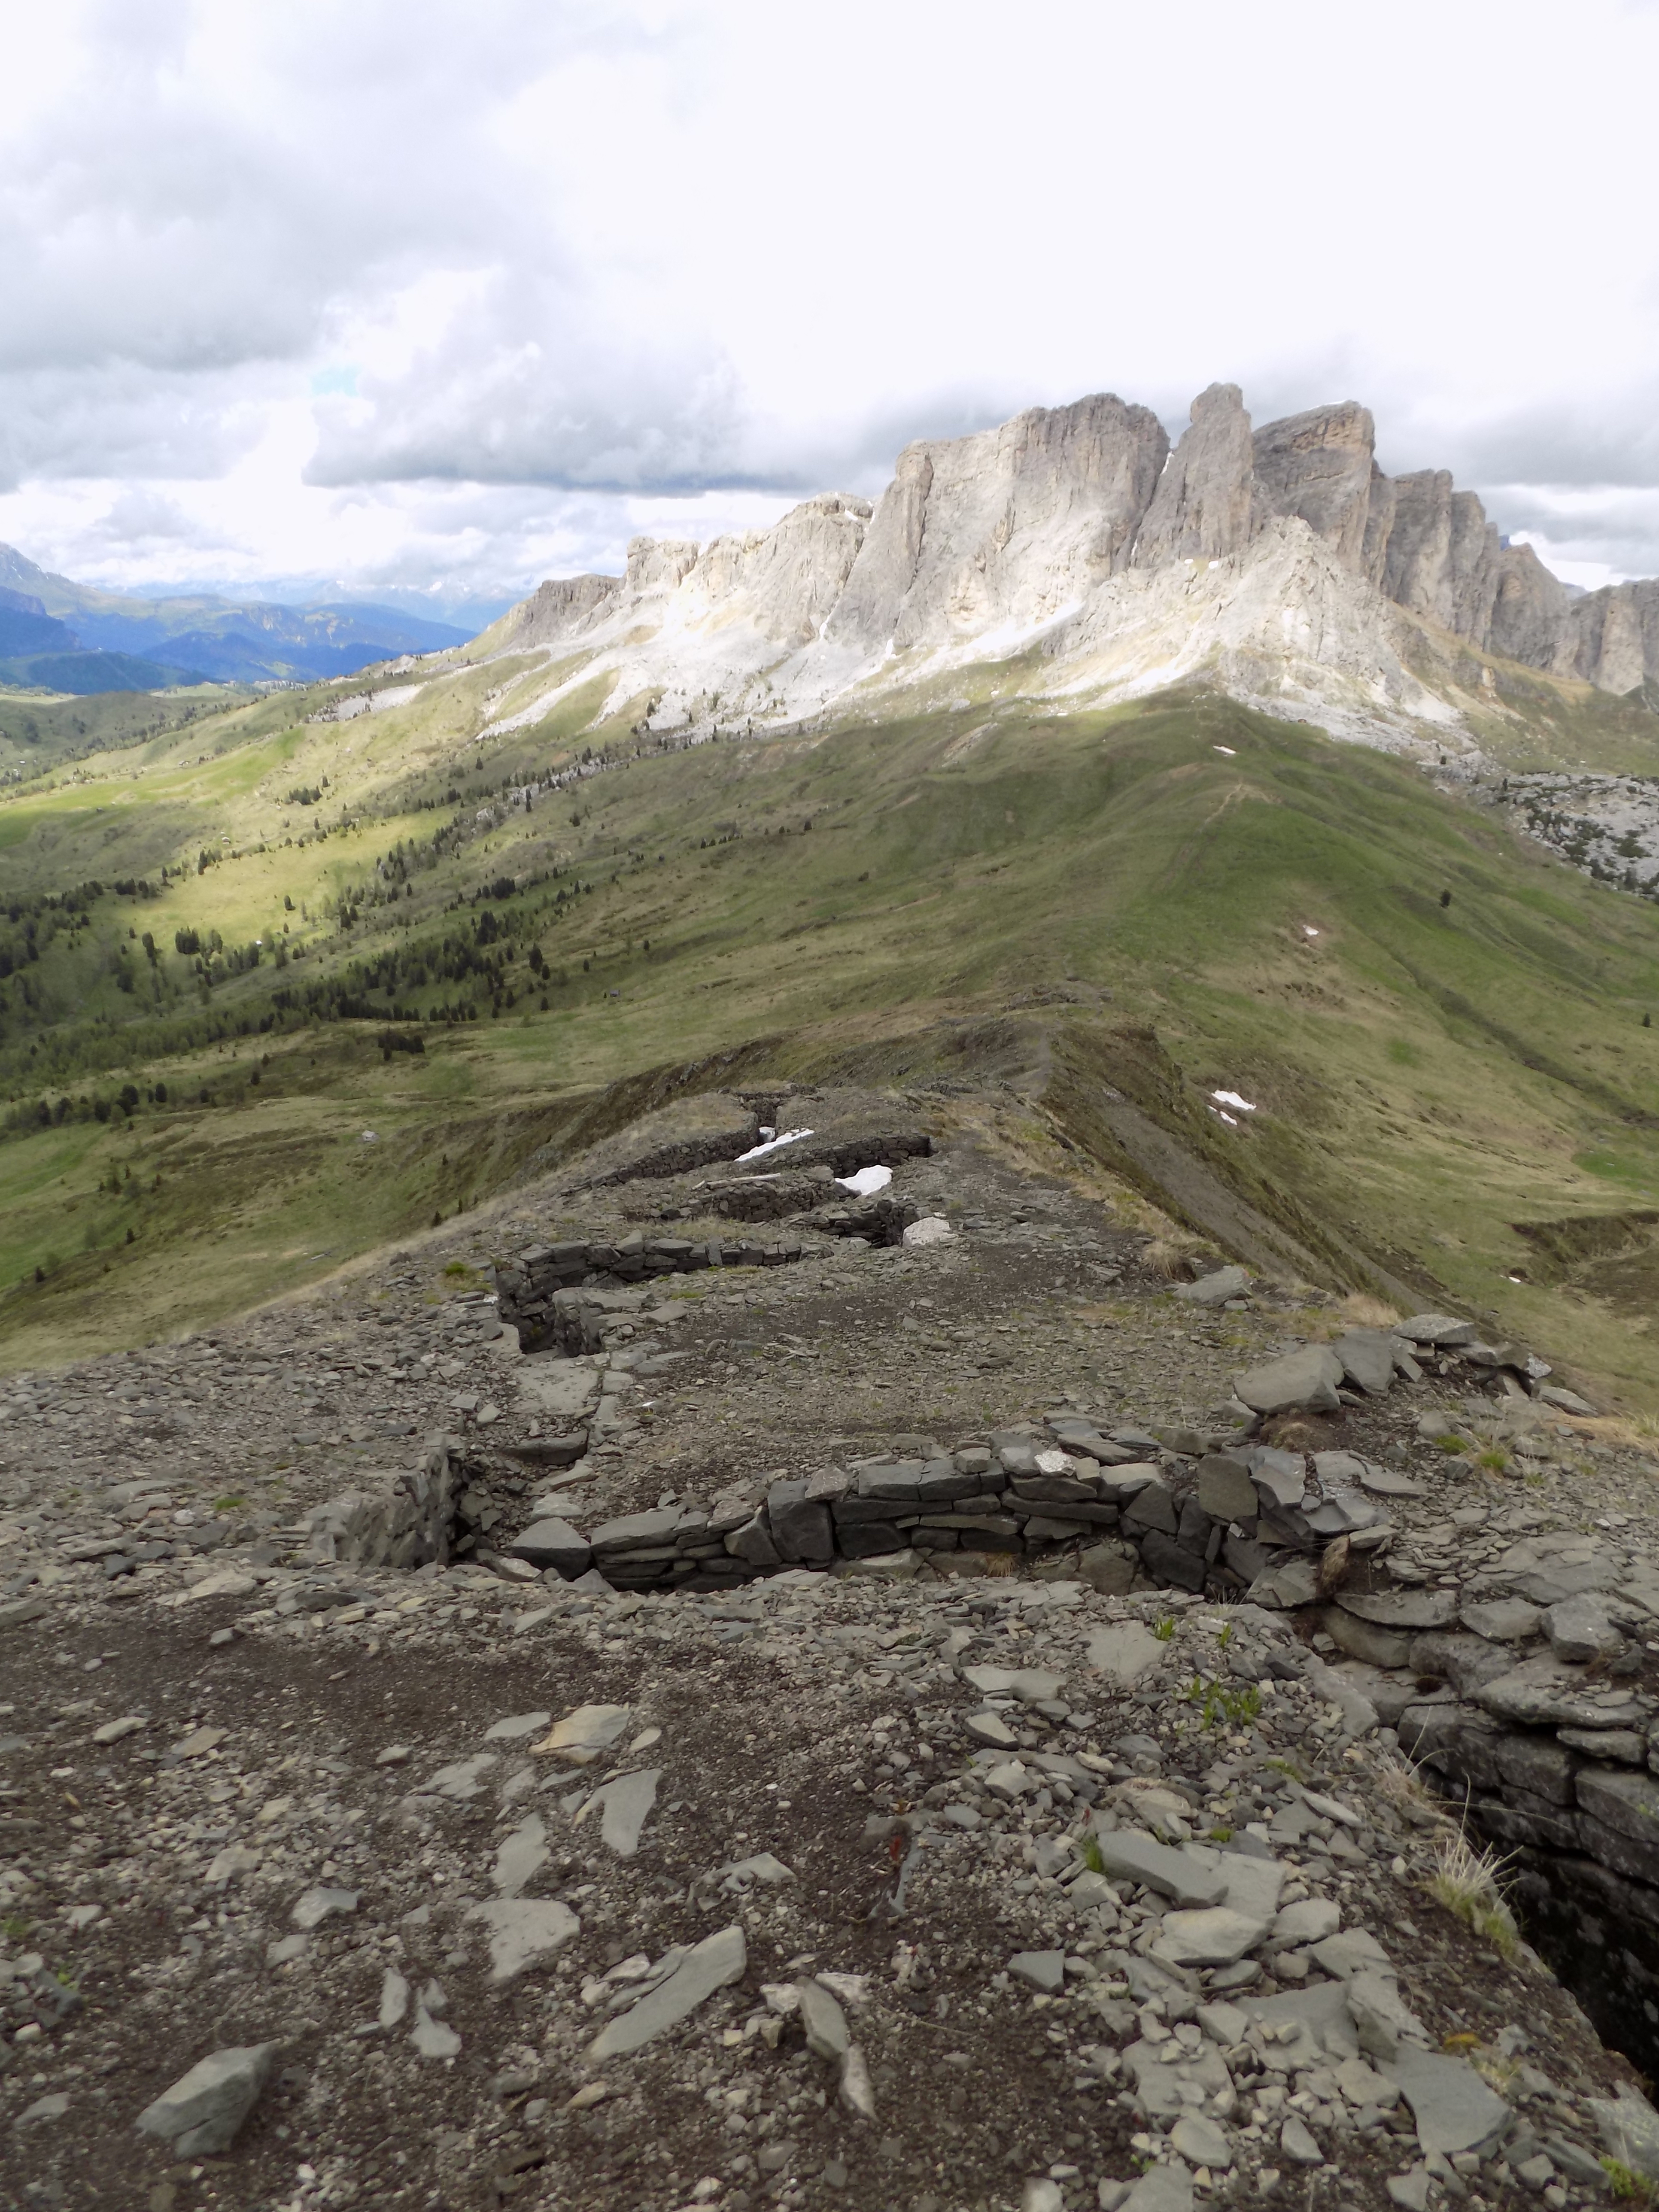
Le cratère Lochnagar aujourd’hui (Wikimedia Commons).


Contact me

Facebook

LinkedIn


[1] Les détails des progrès sur la mine Lochnagar viennent des Journaux de Marche des 185ème et 179ème Compagnies de Tunneliers, et des rapports des Journaux de Marches de la brigade et de la division, dans les Archives Nationales du Royaume-Uni.

[2] Des informations sur la guerre souterraine au Glory Hole sont disponibles ici : http://www.laboisselleproject.com/.

[3] [Ministère de la Guerre], Military Engineering Vol. IV Demolitions and Mining, (London, 1923), p. 143.

[4] 21/10/1915 Rapports de John Norton-Griffiths, Archives Nationales WO158/129

[5] J. Young, ‘Notes on 179 Company R.E.’, Tunnellers’ Old Comrades Association Bulletin, No. 13, (1938), pp. 70-72.

[6] Richardson préparait sans doute une « fougasse », avec laquelle les effets d’un ensevelissement des tranchées allemandes avec une masse de débris étaient accentués en faisant d’abord sauter une mine superficielle puis immédiatement après une charge plus profonde.

[7] J. W. Burrows, The Essex Regiment 9th, 10th, 11th, 13th & 15th Battalions, (Southend-on-Sea, n.d.), p. 149.

[8] 53 Brigade WD, Intelligence Report 23-24/1/16; Brigade Operations Report 30/1-5/2/16; R. Whitehead, The Other Side of the Wire, Vol. 1, (Solihull, 2010), pp. 354-357.

[9] Young, ‘Notes on 179 Company R.E.’, op. cit.

[10] H.M. Hance, lettre à J. E. Edmonds, Juin 1930, CAB45/134.

[11] Young, ‘Notes on 179 Company R.E.’, op. cit.

[12] Hance à Edmonds, op. cit.

[13] Plans de mine, 179ème et 185ème Compagnies de Tunneliers, Archives Nationales, WO153/904

[14] Bullock, ‘Exploits in the First World War’, op. cit.

[15] H.M. Hance, Weekly Mine Report, 5/7/16, 34 Division GS War Diary.

[16] Kriegstagebücher, Pionierbataillon Nr. 13, 1. Reserve-Kompanie M414 Bd. 251-260, Landesarchiv Baden-Württemberg Hauptstaatsarchiv Stuttgart.

[17] Young, ‘Notes on 179 Company R.E.’, op. cit.

[18] R.U.H. Buckland, ‘Experiences At Fourth Army Headquarters’, Royal Engineers Journal, 1927, p. 386.

[19] Transcription sur tapuscrit d’un entretien avec H.R. Kerr par A. Barrie, c. 1959, Barrie Papers, Royal Engineers Museum.

[20] A.G.B. Urmston, lettre à J. E. Edmonds, 11/6/1930, Archives Nationales, CAB45/191.

[21] S. Jones, Underground Warfare 1914-1918, (Barnsley, 2010), pp. 118-120.

[22] III Corps Operation Order No. 70, 20/6/1916 III Corps GS War Diary; 103 Infantry Brigade Operation Order No. 24, 21/6/16 103 Brigade GS War Diary; 101 Brigade Operation Order No. 34 23/6/16, 101 Brigade GS War Diary.

[23] 1st Brigade, Canadian Field Artillery War Diary; 1st Canadian Infantry Battalion War Diary; A. Fortescue Duguid, Official History of the Canadian Forces in the Great War 1914-1919, General Series Vol. I, (Ottawa, 1938), pp. 487-489.

[24] La mine la plus importante sur le front Ouest faisait 50 tonnes, mise à feu par les Allemands à Vauquois le 14 Mai 1916. La plus grosse mine britannique de toute la guerre pesait 43,2 tonnes, mine qui a explosé à St Eloi le 7 Juin 1917. Voir S. Jones, Underground Warfare 1914-1918, op. cit., pp. 63-64.

[25] Bullock, ‘Exploits in the First World War’, op. cit.

[26] Bullock, op. cit.

[27] Soldat non-identifié du 10ème Lincoln, cité par E. Swinton (ed.), Twenty Years After, Vol. 2, (London, n.d.), p.928.

[28] J.C. Neill (ed.), The New Zealand Tunnelling Company 1915-1919, (Auckland, 1922), p. 47.

[29] Bullock, op. cit.

[30] ibid.

[31] ibid.

[32] Soldat Elliot, 20/Northumberland Fusiliers (Tyneside Scottish), cité par G. Stewart & J. Sheen, Tyneside Scottish, (Barnsley, 1999), p. 97.

[33] S. C. Bullock, Address to Rotarians, (n.d.), tapuscrit inédit., avec l’aimable autorisation de Mrs. A. Russell.

[34] Il n’y a aucune preuve de personnes déclarant avoir entendu les explosions de mine en Angleterre le 1er Juillet 1916. Il y a apparemment eu confusion avec la déclaration du Premier Ministre Lloyd George, qui déclara avoir entendu la détonation des mines de Messines le 7 Juin 1917, ce qui est peu vraisemblable : il est plus probable qu’il ait entendu les salves de départ de l’artillerie.

[35] Lewis semble avoir largement surestimé la hauteur atteinte par les débris projetés par l’explosion. Cecil Lewis, Sagittarius Rising, (London, 1977), p. 89.

[36] Capitaine Herries, 22/Northumberland Fusiliers (Tyneside Scottish), cité par G. Stewart & J. Sheen, Tyneside Scottish, (Barnsley, 1999), p. 98.

[37] Lt Col E K Cordeaux, cité dans P. Bryant, Grimsby Chums: the Story of the 10th Lincolnshires in the Great War, (Hull 1990), p. 58; M. Middlebrook, The First Day on the Somme 1 July 1916, (London, 1971), p. 120.

[38] Soldat. H. Baumber cité dans P. Bryant, Grimsby Chums: the Story of the 10th Lincolnshires in the Great War, (Hull 1990), p. 56-57.

[39] Soldat non-identifié du 10ème Lincoln cité dans E. D. Swinton (ed.), Twenty Years After, Vol. 2, (London, n.d.), p.928.

[40] Informations données par M. et T. Beech, Multi-Limn Survey, communication personnelle via P. Barton

[41] J. E. Edmonds, Military Operations France and Belgium, 1916, Vol. 1 (London, 1932), pp. 375-384.

[42] R. Whitehead, The Other Side of the Wire, Vol. 1, (Solihull, 2013), Vol. 2, pp. 296-7.

[43] H.M. Hance, Weekly Mine Report, 5/7/16, 34 Division GS War Diary.

[44] Une carte de l’histoire officielle britannique montre à tort le tunnel avançant dans le cratère Lochnagar, J. E. Edmonds, Military Operations France and Belgium, 1916, Vol. 1, op. cit., Map Volume, map 8.

[45] R.N. Harvey, lettre à J. E. Edmonds, n.d. (c. 1930) CAB45/189.

[46] J. E. Edmonds, Military Operations France and Belgium, 1916, Vol. 1, op. cit. p. 382, fn.

[47] Mes remerciements à Ralph Whitehead pour avoir rassemblé et fourni ces données. Le nombre de tués ou disparus mais non prisonniers le 1er Juillet était de 35, et huit autres disparus mais non prisonniers pendant la période, soit un total de 43 hommes. Voir aussi R. Whitehead, The Other Side of the Wire, Vol. 2, (Solihull, 2013).

(c) Simon Jones. Traduction Fanette Pocentek-Leroy.


Contact Simon Jones

Join me on a battlefield tour with The Cultural Experience. We cut out delays at Dover by travelling via Eurostar from London St Pancras to meet our coach in Lille:

Simon Jones Battlefield Tour Somme Poets 2019

The War Poets: Words, Music and Landscapes, 10th-13th July 2023

The Battles of the Marne & the Aisne 1914 – 1918

First & Last Shots 1914 & 1918

Medics & Padres in the Great War

Walking Ypres 1914-1918

Walking the Somme, Summer 2023

More Information about Battlefield Tours


Austrian positions Monte Sief view to Setas

Col di Lana


pan3601


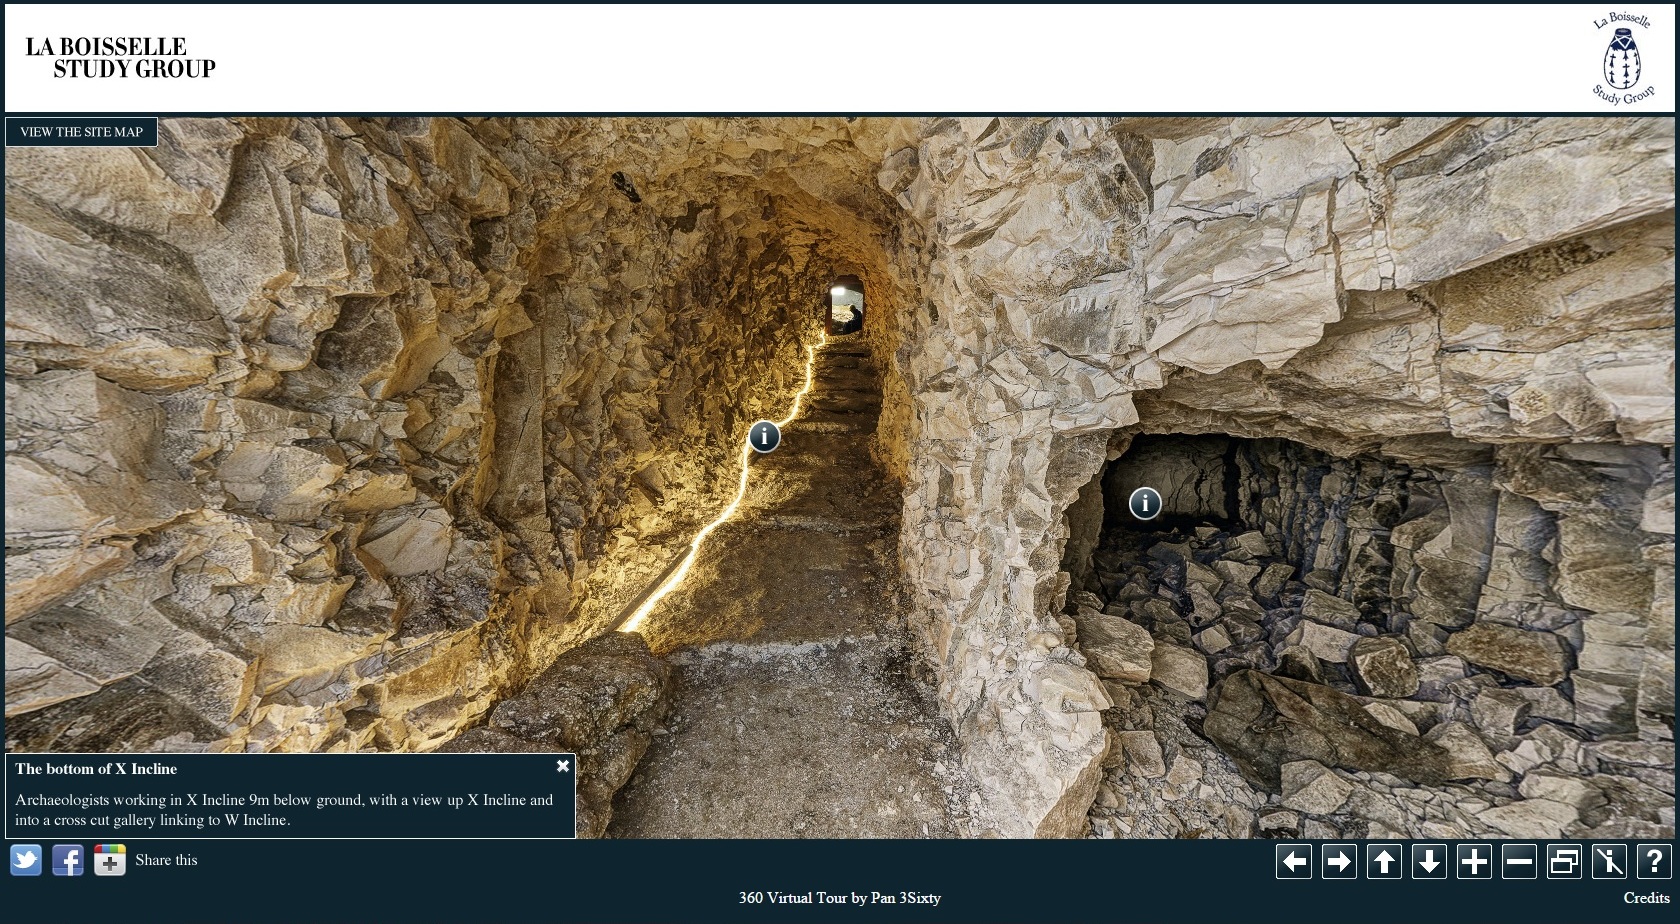
Virtual Tour of La Boisselle Trenches and Tunnels


Shirebrook Miners in the Tunnelling Companies

At the beginning of the twentieth century Shirebrook was notorious in Derbyshire and Nottinghamshire owing to the thousands of miners drawn to its vast colliery. During the First World War, many of those miners joined specially formed Tunnelling Companies to dig deep beneath no man’s land and the German lines. I have gathered the stories below for my book on Tunnellers at La Boisselle in 1915-1916.

A large group of miners recruited from collieries around Chesterfield and Mansfield crossed to France on 23 September 1915 and many were posted to 185th Tunnelling Company. Shirebrook had grown rapidly after a pit was sunk in 1896 and in fifteen years the population had risen from 600 to 11,000. It gained a reputation for immorality, drunkenness and violence with the newspapers filled with reports of attacks on the police, armed poachers and closing-time fights outside the pubs.[1] John Flowers, a 37 year old miner well-known to the police and courts, appeared before magistrates on 4 September 1915 for being drunk and disorderly in Shirebrook, during which he had offered his wife for sale. Although already under a bond of good behaviour, he was let off on the condition that he enlisted. [2]

sheffield-evening-telegraph-september-4-1915

Sheffield Evening Telegraph, 4 September 1915.

Three weeks later he was at the Rouen Base Camp allotted to the 185th. Joe Cox and Tom Hodgetts, good friends in their late twenties, enlisted as Tunnellers on the same day as Flowers. Despite the chaotic picture of Shirebrook depicted in the local press, it was a comparatively small number of miners who regularly appeared before the courts. Eight years before, an encounter with one such individual had serious consequences for Joe and Tom when, one night after closing time, Hodgetts, a keen amateur boxer, agreed to fight the man. Producing a knife, he stabbed both Tom and Joe in the head and neck.[3]

sheffield-evening-telegraph-march-19-1907

Sheffield Evening Telegraph, 19 March 1907.

Joe and Tom survived serious injuries and it may have been this experience that moved Joe to begin organising meetings and preaching at the Pentecostal Mission.

joe-cox-and-tom-hodgettsres

Joe Cox and Tom Hodgetts, 185th Tunnelling Company photographed on the Somme in Albert. (c) Duncan Hunting

In a photograph taken in Albert in the winter of 1915-1916, Tom rests his arm on Joe’s shoulder; only one would survive the war.

derbyshire-courier-tuesday-24-april-1917

The Derbyshire Courier, 24 April 1917.

joe-cox-grave-c-duncan-huntingres

Joe Cox’s grave in Lapugnoy Military Cemetery, France. (c) Duncan Hunting.

A group of miners from the Shirebrook area would excel in driving tunnels though the hard chalk of the Somme and Vimy Ridge. In 1916 they were awarded silver medals by 185th Tunnelling Company for a record drive of 127 feet 4 inches in 120 hours, including Harry Richardson (whose name was given in the press as J. Richardson).

derbyshire-courier-october-12-1918

derbyshire-courier-october-17-1916acontr

Derbyshire Courier, 17 October 1916.

John Flowers, Tom Hodgetts and Harry Richardson survived the war but Flowers was soon in court again for drunkenness, this time blaming wartime gas poisoning for his conduct. The gas he referred to was carbon monoxide, released in large quantities in the underground galleries by the detonation of massive explosive charges. It could cause violent behaviour and permanent mental impairment.

derbyshire-courier-october-11-1919

Derbyshire Courier, 11 October 1919.

[1] Belper News, Derbyshire Courier and Nottingham Evening Post, passim.

[2] Sheffield Evening Telegraph, 4/9/1915; Belper News, 10/9/1915; Silver War Badge roll WO329/3002.

[3] Derbyshire Courier, 23/3/1907, Nottingham Evening Post, 11/4/1907, Derby Daily Telegraph, 11/4/1907.


Join me on a battlefield tour with The Cultural Experience.

Simon Jones Battlefield Tour Somme Poets 2019

The Battles of the Marne & the Aisne 1914 – 1918

First & Last Shots 1914 & 1918

Medics & Padres in the Great War

Walking Ypres 1914-1918

Walking the Somme

More Information


Hawtrey, Young, Bullock 28 June 1916res

The Men Who Dug The Lochnagar Mine


P1110007 CropRotResEnhcrop3

Where and how did Edward Brittain die?


Edward Harrison who gave his life to protect against poison gas


Contact me

Facebook

LinkedIn

The Lochnagar Mine

IWM Q3999

(c) IWM Q3999

One of the most famous and dramatic landmarks on the Somme battlefield is the Lochnagar mine crater near the village of La Boisselle. The yawning chasm is the result of a massive explosion at the opening of the battle at 7.28 a.m. on 1st July 1916.  This article tells you how and why it was blown, who dug it, what effect it had on the Germans, and whether it helped the attack.

Version française ici

The Glory Hole

Underground warfare began in the La Boisselle sector on Christmas Day 1914. The purpose of blowing a mine beneath an enemy position was to destroy a section of the defences but mostly the tunnels were stopped beneath no man’s land by counter mines. By the time the British took over the sector from French troops, no man’s land was riddled with mine galleries below ground and the surface was a mass of large craters, as both sides fought to destroy their opponents galleries by detonating ever larger explosive charges.[1]

RIR111 (c) R. Whitehead

The front line of the German 111th Reserve Infantry Regiment at the ‘Glory Hole’, called by the Germans the Granathof Stellung, 1915-16. ‘Tr’ represents mine craters in no man’s land. (c) Ralph Whitehead.

The specialist British 179th Tunnelling Company of the Royal Engineers arrived in the sector in August 1915 and found the Germans dominant, with deeper and more extensive tunnel networks. There followed a desperate struggle for control of the ground beneath no man’s land and the sector became so riven by mine craters that the British troops named it the ‘Glory Hole’. By October, when 185th Tunnelling Company was brought in to work alongside 179th, they had dug down to the water level at around 100 feet but the Germans were even deeper.[2]

British and German mine systems at La Boisselle. (c) GoogleEarth and Simon Jones

British and German mine systems at La Boisselle. (c) GoogleEarth and Simon Jones

Neither the French nor the British had managed to place a tunnel beneath the enemy front line, but the Germans had achieved it several times, destroying trenches and dugouts and burying alive infantry and engineers.  The Germans had established ascendancy beneath no man’s land on the Western Front and the British response was to form specialist Tunnelling Companies of experienced miners. The officers were mostly mining engineers and 185th was commanded by Captain Thomas Richardson who, a few months previously, had been in charge of sewerage construction in Rio de Janeiro.

Thomas Richardson

Thomas Richardson, first commander of 185th Tunnelling Company.

The Genesis of the Lochnagar Mine

On 11th November 1915, in a new attempt to reach the German trenches, Richardson began a new tunnel away from any known German mining. To conceal the entrance from German view, he began it 400 feet behind his own front line, at a communication trench called Lochnagar Street, but to reach the German lines it would need to be driven almost a thousand feet.

To further conceal the workings and protect them from shell and mortar fire, Richardson first sank a vertical shaft 30 feet and excavated a chamber; from here he began what was described as a ‘main attack gallery’ at a steep 45 degree incline. To remove the spoil, he drove another gallery sloping gently back from the chamber to a point over 100 feet behind. By the end of the month they had driven the attack gallery 115 feet which, if it maintained a 45 degree incline, will have reached 110 feet depth. They had also begun a second gallery at 45 feet depth, running towards the German line on a horizontally plane which had reached 54 feet in length. The miners advanced the tunnels by up to 17 feet a day but the speed of work caused problems for the infantry having to remove the spoil. For every foot dug about 48 sandbags of spoil had to be removed and in early December they lay a trolley way to facilitate their removal.[3] Richardson also began a third gallery towards the Germans by branching from the main attack gallery at 90 feet depth; like the 45 feet gallery, this was horizontal rather than inclined.

Joe Cox and Tom Hodgetts (c) Duncan Hunting

Joe Cox and Tom Hodgetts, miners from Shirebrook, Derbyshire, serving with 185th Tunnelling Company photographed on the Somme in Albert. Friends from before the war, only Tom survived. (c) Duncan Hunting

At the deeper levels, the chalk was extremely hard and the engineering contractor who had recruited the Tunnelling Companies, John Norton-Griffiths, advocated using pneumatic picks to drive tunnels through it at the water level, between 80 and 120 feet deep, to attack the Germans.[4] Richardson, however, did not to use a compressor to drill the Lochnagar tunnels mechanically, although one was installed at the far more extensive Inch Street system in the Glory Hole. Compressed air driven rotary drills were not a success and stuck in small pockets of soft chalk,[5] while hammer drills could be heard for long distances underground, alerting the enemy to the activity. The alternative however was also noisy, as it involved shot blasting with explosives from 1½-inch diameter holes hand-drilled into the face. The reverberation of the denotations were clearly heard and felt for long distances underground, but Richardson and his German opponents adopted shot blasting as the only means of making progress. Captain Henry Hance, who commanded 179th Tunnelling Company, disliked this method because he believed it would provoke the enemy and alert them to the British work, but he also had no choice but to adopt it.

Sometime in January 1916 Richardson ceased driving the main attack gallery, possibly because it was well below the water level and will have needed constant pumping. He continued the 45 feet and 90 feet deep horizontal galleries and, because the ground rose towards the German lines, their depths slowly increased to 50 and 100 feet. Richardson’s reasons for driving galleries at different levels are not fully clear but they enabled him to listen more effectively for German counter mines and also enabled him to mask the noise from his deeper gallery with deliberately noisy work at the upper level.[6]

LaBoisselleWTransversal

A British tunnel at 80 feet depth in the hard chalk at La Boisselle explored in 2013. (Iain McHenry/La Boisselle Study Group)

German Suspicions: Silent Working

The spoil heap from the Lochnagar workings quickly grew to ‘a colossal mountain of white chalk burrowed from the bowels of the earth.’[7]  The Germans could see it from aerial photographs and probably also from their own lines and began to shell it regularly. Early on the 30th January, the Germans launched a raid on the British front line south of the Lochnagar mine, capturing a dozen men of the Essex Regiment but failed to reach the mine entrance. [8] It was a lucky escape but shortly afterwards, a disaster was to befall 185th. On 4th February, while Richardson was experimenting with a listening apparatus in the Inch Street system, the Germans blew a mine charge close to a British gallery. Methane from the explosion was forced into the British system and detonated, badly injuring Richardson and another officer; the resulting vacuum drew in carbon monoxide, also a by-product of the original explosion, which killed the two officers and sixteen miners.

Three weeks later, 185th Tunnelling Company was ordered to a new sector to the north and Hance’s 179th took over its underground workings. By this time, the upper Lochnagar gallery was advanced almost 800 feet, the lower 535 feet. Hance halted work on the deeper gallery and just continued the upper, which was now less than 200 feet from the German front line. The danger of detection was now extremely real. They halted work frequently to listen for sounds of German countermining, often for long periods, and on 8th March no sounds were audible to the naked ear for 24 hours. By the end that month, the face of the Lochnagar tunnel was about 140 feet from the Germans and 179th had to try to work in complete silence if the Germans were not to detect them. The hand-pushed spoil trucks were too noisy, even though they were fitted with rubber tyres and ran on wooden rails and, as one of the officers, James Young, recalled, ‘at the end everything was man-handled.’[9]  Lieutenant Stanley Bullock described the ground as ‘broken chalk’, which meant that it was possible to get a bayonet point into cracks in the face, and Hance described the methods used to avoid being heard:

It was done in silence. A large number of bayonets were fitted with handles. The operator inserted the point in a crack in the “face”, or alongside a flint, of which there were any number in the chalk, gave it a twist which wrenched loose a piece of stone of varying size which he caught with his other hand and laid on the floor.  If, for any reason, he had to use greater force, another man from behind would catch the stone as it fell.  The men worked bare-footed, the floor of the gallery was carpeted with sandbags, and an officer was always present to preserve silence.  As sand bags were filled with chalk they were passed out along a line of men seated on the floor, and stacked against the wall ready for use later as tamping.[10]

H M Hance

Henry M. Hance, commander of 179th Tunnelling Company, photographed before the war. (c) Mr. J. Bennett and Simon Jones.

To ventilate the long drive they used large blacksmiths bellows connected to hose which ran up to the working face but the air was still so poor that candles would only burn at the face directly where the air came out of the hose.[11] They reduced the size of the gallery to about four and a half feet high and two and a half feet wide, leaving less to excavate, but conditions were even more uncomfortable.  Hance recalled:

The work was extremely laborious, and if we advanced 18” in 24 hours we thought we did well.[12]

In fact, average progress during March fell to less than one foot a day.[13]

In the Inch Street system, the galleries of both sides were so close beneath no man’s land that a break-in, described by Bullock as ‘one of the things we dreaded,’ was daily expected and finally occurred on 10th April 1916.[14] Captain Wilfred Creswick, in charge of the Inch Street and Lochnagar workings, entered an enemy gallery but the Germans blew a charge laid in readiness and he, with two miners working nearby, were killed and their bodies lost beyond recovery. Creswick was replaced as Section Commander by James Young, a colliery manager from Kilmarnock; he was to be responsible for the completion, charging and firing of the Lochnagar mine. The next day, the Germans raided the front line above the Lochnagar mine for a second time, capturing 29 British infantry but, again, they did not penetrate as far as the tunnel entrance. On the day of the raid, Hance was sent for extended leave to a rest centre in Marseille for reasons not recorded but probably exhaustion and he didn’t return until 7th June. Until then, 179th was under the second in command, Captain Gilbert Rowan, a colliery manager from Fife. This was to be a crucial period of preparation for the Somme offensive.

Gilbert Rowan (c) Fiona Middlemiss

Gilbert Rowan, who commanded 179th Tunnelling Company during much of the preparation for the Battle of the Somme. (c) Fiona Middlemiss

The Lochnagar tunnel was directed at a German position known as the Schwabenhöhe from which the Germans had a wide field of fire against British attackers crossing an area known as Sausage Valley. Hance described the objective as being threefold:

(1) to destroy the enemy trench and to knock out his machine guns at this point, where his trench formed a pronounced salient (2) to destroy his underground system whatever it might be (3) to kill any troops he might have sheltering underground from our bombardment.[15]

In mid-April, 179th branched the tunnel to aim at two points on the German front line with the intention of placing two mines, 250 feet apart but, as the branches were slowly advanced, they began to hear the sounds of Germans overhead, digging down from their front line. The German mining operations were carried out by Württemberg troops of the 1st Reserve Company of the 13th Pioneers, commanded by Lieutenant Sihler. Sihler must have suspected British activity because in April he started two underground listening galleries from the Schwabenhöhe; on 22nd reported that noises had been heard in front of the southern part and began three more tunnels to try to locate the source. By the end of the month, the two closest to the British tunnel were about 130 feet away but, although the southernmost was kinked slightly towards the British tunnel, they continued otherwise straight suggesting that Sihler had not pinpointed its location. By mid-June Sihler’s two galleries closest to the Lochnagar tunnel were both down over 80 feet (27m and 26m), almost twice as deep as the British.[16] ‘Jerry was very close and under us,’ Young recalled and, as they worked silently in the Lochnagar tunnel, the British miners could hear the Germans plainly with the naked ear, in a gallery descending from their front line, ‘stumping down their incline’ and also clearly above in dugouts.[17] But the sounds didn’t get any closer: Sihler knew they were somewhere but didn’t know exactly where.

The Coming Somme Attack

During April and May Rowan had to deal with increasing demands on his men for the coming Somme offensive. The 179th was engaged in a second major mine gallery on the left side of La Boisselle village, aimed at a German position known as Y Sap, which was to be even longer than the Lochnagar tunnel. Rowan was also ordered to dig a series of shallow tunnels across no man’s land, known as ‘Russian Saps’, not only at La Boisselle but opposite Ovillers and Thiepval to the north, intended as mortar or machine gun positions and to enable re-supply once the German front line had been captured. One, known as Kerriemuir, was started in April about 400 feet to the left of the Lochnagar mine. Rowan had to withdraw a quarter of his personnel from the tunnel system at the Glory Hole to work on the Russian Saps and the blowing of mines in the Glory Hole was stopped unless absolutely necessary.[18] Hugh Kerr, in charge of the Y Sap tunnel, paid tribute to the men of 179th:

The men worked like hell – you never saw such workmen in your life.  They went all out. We had over 900 strong at one time; had about 600 or 700 infantry attached humping sandbags out of the place.[19]

Daily Mirror May 25, 1917-Small

Hugh Kerr, responsible for the Y Sap mine which he fired on 1 July 1916. (Daily Mirror 25 May 1917)

On 15th May Rowan attended a meeting at III Corps headquarters at which the coming attack was explained: ten days later he suffered a reoccurrence of a gastric ulcer. It was only in mid-June, when the commander of Fourth Army, General Rawlinson, issued orders for the attack, that the rest of the 179th were definitely informed of it. The strain of the work also told on the men and during late May and June some miners were demoted from six shilling a day ‘Tunnellers’ to two shillings and two pence ‘Tunneller’s Mates’ for ‘inefficiency’ or ‘laziness’, a major blow to the pride of a miner who could earn far more at home. On 19th June, a Sergeant deserted but was later allowed to continue serving in the ranks.

The Y Sap mine reached its target beneath the German position, at the cost of sacrificing quiet working, but progress at Lochnagar was so slow that time was running out. When the 4th Army Operation Order was issued on 14th June, neither of the two Lochnagar branches tunnels had reached beneath the German line, both were well over a hundred feet short. Hance stopped driving the two tunnels forward and began cutting out chambers to contain explosives. To compensate, he would have to ‘overcharge’ the mines with far more explosive than was needed simply to form a crater, in order to throw the maximum amount of debris over the German trenches: rather than blow the defenders skywards, they would bury them alive.  The overcharging would also to throw up high lips of debris which might form a barrier to prevent the Germans firing from the flanks, especially from the village of La Boisselle across no man’s land, and also create high ground from which the attackers could gain observation and fire over the Germans. But this depended on the attackers reaching the high lips before the Germans and previous experience showed that the Germans were faster than the British at capturing crater lips, even when taken by surprise.

The plan by the 34th Division to capture the heavily fortified La Boisselle relied on a converging attack which would envelop the village. Rather than helping this attack, the mines risked disrupting it, for the attacking infantry would have to pass either side of the Lochnagar  and Y Sap mines, leaving gaps in the advance. The battalion on whose left front the Lochnagar mine was to be detonated, the 10th Lincolns (Grimsby Chums), had to delay their advance because of the need to withdraw from their front line owing to the danger of their trenches collapsing and the perceived danger of falling debris. No man’s land was wider to the right of the mine and this meant that they had to cross an even wider expanse. When the commander of the brigade which was to make the attack at this point (Brigadier-General R. C. Gore, 101st Infantry Brigade) briefed his battalion commanders on the coming operation, one, Lt. Col. Urmiston, 15th Royal Scots, objected that the mine would delay the advance and leave his men vulnerable to machine gun fire coming from his left when the German machine gunners would be able to focus entirely on his battalion. He offered to change places  with the Lincolns, closest to the mine, and take the risk from the debris, if it meant that all the units could advance simultaneously. According to Urmiston, his offer was declined by his brigade commander who felt unable to alter decisions already taken by the higher command.[20]

The timing of the mines blown on 1st July 1916 became controversial when that at Beaumont Hamel was detonated ten minutes before Zero.[21] This fatal error not only gave the Germans the perfect warning that the attack had finally come but also disrupted the timings of the crucial barrage lifts in the whole sector, denying the attacking infantry the protection of their own guns so that troops could try to seize the crater in advance of the main attack. This was not proposed at La Boisselle where initially the Lochnagar mine was ordered to be fired at one minute before Zero and the Y Sap Mine at Zero. Within a few days orders were amended so that Lochnagar was to be blown two minutes before Zero, then both mines were to be blown at this time.[22] This was probably prompted by caution over the attackers being injured by falling debris and the danger of a slight delay in the mines firing. Two minutes were in fact more than adequate for the debris to fall but it required precise coordination of the firing of the mine and the advance by the infantry. The infantry were eager to get across no man’s land as soon as their barrage moved on to the next line of defences, before the Germans could open fire, but the mining officer in the trenches had to fire the mine exactly to synchronise with the artillery barrage and the infantry attack. The decision as to the timing will not have been Hance’s although he may have been consulted and will have had a view. He had been awarded the Military Cross for charging and firing a mine on 15th June 1915 at Givenchy, which had killed a Canadian officer and buried other attackers. As with Lochnagar, it was overcharged because it had not reached as far as the German line and was also blown two minutes before zero.[23]

Aerial PhotographRes

Aerial photograph with British and German mining south of the Glory Hole prior to Zero on 1st July 1916. (c) Landesarchiv Baden Württemberg/ Annotations (C) Simon Jones.

Charging the Mine

As Hance calculated the quantity of explosives needed at Lochnagar and Y Sap he will have known of no one else in history who had created such large explosions.  He would place 40,000 pounds (18.1 tonnes) at Y Sap and two charges of 30,000 pounds (13.6 tonnes) at Lochnagar.  The left branch at Lochnagar was roughly at ninety degrees to the German trench while the longer right branch approached it at about forty-five. Therefore he divided the charges unevenly, placing 24,000 pounds in the left branch and 36,000 in the longer right branch. The two chambers were not large enough for the charges which would overflow into the branch galleries back to the junction and the charges would form one massive crater. The combined 60,000 pounds (27.2 tonnes) would therefore give 179th Tunnelling Company the record for the largest mine yet blown by the British.[24]  At the same time 179th would fire two 8,000 pound ‘camouflet’ charges in the Inch Street system to destroy the German galleries, this meant that a total of 116,000 pounds (52.6 tonnes) had to be carried into the front line and down the long tunnels.

Since 5th June, 179th had known that the attack would be preceded by five days of preparatory bombardment and gas attacks, during which time the trenches were to be kept as empty as possible. As well as the danger of some of the British shells falling short, the Germans were very likely to respond with counter shelling and they needed to complete charging before this began, although the date was yet to be announced. Bullock described how the explosive for the Lochnagar mine and the two camouflets was brought up by night in horse drawn wagons to a chateau just behind the lines at Bécourt, which also housed a medical unit and Brigade headquarters:

much to the anxiety of the Brigade Major, who certainly had reason for his fears since, should this have been exploded, which was quite likely considering that the Germans were frequently bombarding this place, he and his staff and the dressing station would all have gone sky high.[25]

Every night for about a week, infantry parties carried over one and a half thousand boxes, each containing 50 pounds of the ammonal explosive, up to the mine entrances:

I or one of the other Tunnelling Officers had always to meet these parties in order to see that the work was duly carried out and at the same time guide them through the trenches. As may be imagined, this was not a task particularly enjoyed by those concerned, as, not only was it very heavy work, as the trenches at that time were wet and greasy, but the job of carrying explosive about with the likelihood of shells dropping amongst you was not a particularly desirable one. By the time the Infantry had been on this work for two or three nights the general impression amongst them was that we were getting up enough explosive to blow Fritz back to Berlin.[26]

The boxes were about a foot square and, according to one of the Grimsby Chums, each infantrymen had to take up two:

… we carried ammonal up to the mouth of a mine-shaft, in square wooden boxes, each containing 50 lb., two being nailed together with narrow strips of wood which served as handles. On the first night we were in a trench behind the château, awaiting the order to move off, when we were startled by a shower of 5.9’s, and a near-stampede followed. Fortunately, those in front moved off briskly, and those behind lost no time in following. The boxes were delivered in record time![27]

During the day they decanted the ammonal explosive into rubberized canvas bags to keep it dry during the two weeks that it would lie in the chamber. Each bag contained about thirty pounds and for the Lochnagar charges they filled 2,000 bags. One tunneller described decanting as:

a dangerous and unpleasant job, the ammonal dust staining everything it came in contact with, including arms and faces, a violent and lasting yellow.[28]

The charging of Lochnagar was begun by Captain James Young and Lieutenant Ralph Fox and they expected to get the job about half complete before they were relieved after 48 hours.  They did not use the wheeled trolleys for fear of alerting the Germans and the quantity of men needed soon ate up all the available oxygen in the cramped, 900 foot tunnel.  When Bullock and Second Lieutenant Alexander McKay took over, they found only about twenty bags loaded. Rather than trying to carry the bags down the tunnel, they organised the men as a human chain along the entire length, while the officers took it in turn to stack the bags in the chambers and branch galleries:

We determined to get along with the thing as quickly as possible and took eight hour spells in the face each with periodical trips up and down the gallery in order to keep the Infantry passing bags from one to another at full speed. This could only be done by having the men spaced every two yards, thus curtailing the distance each man had to carry.[29]

Q115 IWM Collections

In this staged photograph, a Tunnelling officer demonstrates a geophone listening device while the miners appear to be putting in tamping for a mine charge. In reality, the geophone was too sensitive to be used when men were working in the vicinity. (C) IWM Q115

All the time they were conscious of the Germans above and below but, so long as they could hear them, they knew that they were not going to blow.  The German routine was to stop work between midnight and 7am: it was during this silent period that there was the greatest risk of being blown but 179th could not stop work. By 7am they had loaded about 400 bags and anxiously waited for the Germans to resume: instead there was a further silence that Bullock found ominous and terrifying:

we all thought that the Boche must have tumbled to what we were doing, and we half expected to have the whole thing blown up any minute, the only consolation being that we should not know what had happened.[30]

Finally, after an hour, the Germans started work as normal; Bullock never understood the reason for the delay. Later that morning they had half the charge loaded and the detonators and leads prepared for embedding in the charges.  Both charges at Lochnagar required twelve detonators, connected in series, each inserted into a guncotton primer, which were placed inside charge bags and buried evenly throughout the explosives, plus a complete back-up system of another twelve detonators in case the first failed.  It was the most dangerous part of the work, carried out by the officers in the chambers, surrounded by hundred of stacked bags of explosives. Bullock and McKay had all the detonators in, the leads connected and the two chambers about three-quarters charged when Young came up that afternoon to take over.  He expected to check that the detonators were in correctly and the leads properly connected, but Bullock and McKay had worked much faster than he anticipated – one senses rivalry between the shifts and the officers – and Young had no choice but to report to Hance that everything was in order.  By the following morning they had completed the charging and begun backfilling, or tamping, the tunnel.  They had stored hundreds of sandbags of chalk along the gallery in readiness and used them to block the tunnel solidly for 350 feet from the branch.

 Zero

On 23rd June Fourth Army ordered that the bombardment should begin the following day, this would make Zero day the 29th. On the afternoon of 28th June, six officers detailed by Hance to fire the four mines went to the headquarters of 34th Division for their final instructions for the attack the following day.  The firing of Lochnagar was the task of James Young and Second Lieutenant Ralph Fox, Stanley Bullock and Alexander McKay would blow the two mines in Inch Street, and Y Sap was blown by Captain Hugh Kerr and Lieutenant Ralph Hawtrey. They learned that Zero Hour was to be at 7.30 a.m. and that they were to detonate the four mines two minutes before. They set their watches by one at headquarters which in turn had been synchronised with others sent to each headquarters all along the attack front. No sooner had they reached the front line, after a long journey through trenches packed with troops preparing for the attack, than they were ordered to return: Zero had been postponed for two days to 1st July. Bad weather had prevented accurate bombardment of the German positions and more shelling was needed.

Hawtrey, Young, Bullock 28 June 1916res

Ralph Hawtrey, James Young and Stanley Bullock, 179th Tunnelling Company, in Albert on 28th June 1916, prior to leaving for the front line for the opening of the Battle of the Somme. Ralph Hawtrey was killed at High Wood in September. (c) Mrs. A. Russell and Simon Jones

When the firing party went up for the second time the German retaliation had begun: the shrapnel shells bursting in the air was ‘one of the most brilliant displays of fireworks’ that Bullock had ever seen.[31]

The firing leads were run back to dugouts close to the front line, where in the early morning, the six tunnelling officers were checking and re-checking the firing circuits by passing through a low current from a battery to flick the needle of a galvanometer. Even though they had used twin sets of leads for each mine, sudden shelling could cause a breakage that might be impossible to find and repair. All the effort would have been wasted and the attackers would lose the advantage that the mines promised. At 6.25 a.m., the British bombardment resumed with a fierce new intensity.

The infantrymen who were to attack near to the two mines had been warned to stay out of any unsupported dugouts, to beware of falling debris and to expect craters 150 yards across. A whole section of the British front line which jutted out immediately to the right of where Lochnagar was to explode was evacuated by the 10th Lincolns (Grimsby Chums) owing to the danger. To the left, in the Tyneside Scottish someone in the first wave shouted to his men five minutes before Zero, ‘NOW! Get hold of the parapet boys, she’s going up’.[32]

Opposite, mostly deep in their dugouts and the cellars of La Boisselle, men from Baden of the 110th Reserve Infantry Regiment had endured a week of torment from explosions, thirst and hunger. But in most places, although their trenches were in ruins, the dugouts held up against the British shells and only to the south of the Schwabenhöhe had heavy mortars caused some to collapse.

At 7.28 a.m. Stanley Bullock rammed down the handle of his exploder to fire the first of the Inch Street mines. After the merest pause, he felt the ground beneath him shudder, a few seconds later another shake of the ground told him that Young had successfully fired Lochnagar:

In the suspense which ensued before I felt the next mine explode, there was no thought for the destruction of life and waste of material when thousands of tons of explosives disappeared into space, only that orders should be faithfully obeyed.[33]

McKay then pressed his plunger home; they did not notice the Y Sap mine go up but Kerr fired it successfully. On the ground, the shockwaves of the mines were felt far more than heard, there was no bang, either on the Somme or in England as was claimed much later;[34] but 8,000 feet above the battlefield the sound waves reached a pilot who had been warned to keep clear of La Boisselle but turned his machine to observe the detonations of Lochnagar and Y Sap:

… the earth heaved and flashed, a tremendous and magnificent column rose up into the sky. There was an ear-splitting roar, drowning all the guns, flinging the machine sideways in the repercussing air. The earthy column rose, higher and higher to almost four thousand feet. There it hung, or seemed to hang, for a moment in the air, like the silhouette of some great cypress tree, then fell away in a widening cone of dust and debris. A moment later came the second mine. Again the roar, the upflung machine, the strange gaunt silhouette invading the sky. Then the dust cleared and we saw the two white eyes of the craters.[35]

© IWM (Art.IWM ART 2379)

‘The Great Mine, La Boisselle’, the Lochnagar Mine depicted by the artist William Orpen in 1917. © IWM (Art.IWM ART 2379)

An officer of the 3rd Tyneside Scottish, in the second wave to the left of the Lochnagar mine, was exalted:

…we witnessed a most wonderful spectacle. A huge column of chalk was thrown up several hundred feet into the air and came down in a beautiful white cascade. [36]

One of the Grimsby Chums described ‘the whole ground around swaying and rocking as with an earthquake’ and another, who braced his leg against the trench, had it broken by the shock wave.[37] They felt the ground sway three times and saw a crust of earth rise and bursting from it a core of amber:

great pieces of earth as big as coal wagons were blasted skywards to hurtle and roll and then start to scream back all around us. A great geyser of mud, chalk and flame had risen and subsided before our gaze.[38]

Another likened the swaying of the ground to the plate of a weighing machine:

Looking over the parapet, one saw a huge wall rise to some three hundred feet, composed of chalk, mud, dust, timber, etc., with here and there a German. [39]

LEAD Technologies Inc. V1.01

The Lochnagar crater, shortly after it was blown, showing the location of the two charges. From The Work of the Royal Engineers in the European War, 1914-19. Military Mining (Chatham, 1922).

The Lochnagar mine hurled up 84,000 tonnes of earth and chalk and left a crater 220 feet across and 55 feet deep.[40]  The debris buried 600 feet of the German front line and the Baden infantry in the dugouts had no chance: some were instantly fragmented, some hurled into the air, crushed, or would die slowly trapped 30 feet underground.  At Y Sap the mine completely destroyed the German advanced position, leaving a high-lipped crater 130 feet wide but, having detected the British digging beneath them, the Germans had withdrawn back to their front line and suffered no casualties.

Two minutes after the mines detonated came Zero. As the British guns lifted their fire from the German front line to the positions behind, 4,000 heavily burdened British soldiers climbed out of their trenches and began walking across the overgrown fields of no man’s land while, behind them, another 4,000 surged forward. Soon more would advance, for the commander of the 34th Division had deployed all his 12,000 infantry at once against La Boisselle.

Apart from around the Lochnagar mine and in places south of the Schwabenhöhe, the deep German dugouts had withstood the British bombardment. The mine explosions and the lifting of the British barrage alerted the Baden infantrymen that the long-expected attack had arrived.  The survivors emerged from dugouts with machine guns and rifles to open fire on the rows of soldiers advancing in orderly lines through the long grass and sweeping down the slopes behind in columns.  Within two minutes of setting out, the leading attackers were struck by the German machine gun and rifle fire.  Many of the Grimsby Chums and 11th Suffolks were hit before they had even passed their own front line, having been pulled back to avoid the Lochnagar mine debris. The pace of the advance was carefully regulated to keep behind the protective British barrage but as the men at the front faltered, those following caught up and the bunched men formed perfect targets. Within ten minutes eighty percent of the leading battalions were hit. The losses suffered by the 34th Division attacking at La Boisselle were the worst of any on the 1st July 1916.[41] Urmiston was correct in his prediction about heavy German fire, except that it was experienced by all the attacking battalions. However, the Lochnagar mine successfully destroyed a section of the German front line. The destruction enabled the attackers to penetrate the German front line and advance beyond it until, counterattacked, they were forced back to the area of the crater.[42] In his report on the mine, Hance claimed that the mine had benefited the attackers by causing ‘considerable loss’ to the Germans and that:

by the violence of the shock to his garrison, and the shelter afforded by the lips of the crater itself, enabled our attacking infantry to reach his trenches here, and to pass over them in the first assault, with comparatively light loss. Such loss as was incurred must have been caused by fire from his flank. The infantry were also on Z night to establish themselves inside this crater, forming an advance position in front of our original trenches.[43]

Attack of 34th Division (Official History)

The attack of the 34th Division on 1st July 1916 (British Official History).

The Kerriemuir Russian Sap was intended to allow the re-supply of the captured front line in just such an eventuality. By the night before Zero, the 179th was supposed to have prepared the tunnel with just two feet of cover left before it broke the surface, three-quarters of the way across no man’s land. The final work of opening it immediately the mines were blown was the task of a platoon of the 18th Northumberland Fusiliers Pioneers under Lieutenant John Nixon.  On the evening of 30th June, however, Nixon was shocked to learn that his men would have to dig through twelve feet of chalk to open the tunnel, a full day’s work. They therefore began the task at midnight and managed to open the Kerriemuir tunnel an hour after Zero, and it was used later in the afternoon to feed men through to reinforce the captured German line in the Schwabenhöhe (it was not, as was claimed later, connected to the Lochnagar mine crater).[44]

Q 49394

A burial mound in the bottom of the Lochnagar Crater, September 1917. (c) IWM Q49394.

Although the Lochnagar mine gave some assistance to the British attack, Germans losses caused by the explosion were subject to a confused and exaggerated claim from the British side. The GHQ Inspector of Mines, Brigadier-General R. N. Harvey, visited a week after the attack and spoke to the 179th officers who had been on duty. He later described the effect that the Lochnagar mine was believed to have had on the Germans:

We reckoned we closed in 9 deep dug-outs, each with an officer and 35 men – for prisoners were taken from the next dug-out, they were all marched out and the officer said there were 9 other dug-outs with the same numbers of inhabitants as his, i.e. 9 x 1 officer and 35 men – 9 officers and 315 men.  As a result, our troops went over with few casualties.[45]

The British Official Historian erroneously ascribed Harvey’s claim to the Y Sap mine rather than Lochnagar but neither Harvey’s estimate of the German losses nor his claim of light casualties to the attackers are supported by the evidence and there is no record of any British attempt to excavate German dugouts collapsed or destroyed by the mine.[46] German records show that nothing like the number of men referred to by Harvey was holding the affected front line which was part of the sector of the 5th Company of 110th Reserve Infantry Regiment. An analysis of casualty reports shows that this company suffered 109 casualties between 27th June and 3rd July, of which 35 were reported as killed or missing (killed) on 1st July.[47] It is possible therefore that the garrison of no more than one German dugout was lost as a result of the explosion of the Lochnagar mine.

La Boisselle fell to the British on 4th July, but James Young did not see the crater of the Lochnagar mine before he was wounded on 8th July. He survived the war, and died in 1949.

After the Y Sap crater was filled in during the 1970s, the Englishman Richard Dunning purchased the crater to ensure its preservation to which aim the Friends of Lochnagar work today.

OLYMPUS DIGITAL CAMERA

The Lochnagar Crater today (Wikimedia Commons).


See below for the references to this article.


Buy signed copies of The War Underground 1914-18 and World War I Gas Warfare (Osprey Elite Series)PXL_20240524_113844426-cr


Peckham-enh

Myths of Messines: Four Misconceptions about the 1917 Battle Re-examined


joe-cox-and-tom-hodgettsres

Shirebrook Miners in the Tunnelling Companies 


Underground Warfare 1914-1914 in paperback

Buy Underground Warfare 1914-1918 at a reduced price


H15258

Myths of Messines: The Lost Mines


A Memory of Christmas 1914

Understanding the 1914 Christmas Truce


More pages:

Men of 179th and 185th Tunnelling Companies

Contact Simon Jones

Video lecture Born Fighters: Who were the Tunnellers?

Virtual Tour of Tunnels and Trenches excavated at La Boisselle.


Contact me

Facebook

LinkedIn


The Lochnagar Mine: References

[1] Information about underground warfare at the Glory Hole can be found at http://www.laboisselleproject.com/.

[2] Details about the progress of the Lochnagar mine are from War Diaries of 185th and 179th Tunnelling Companies, and reports in brigade and divisional War Diaries in the UK National Archives.

[3] [War Office], Military Engineering Vol. IV Demolitions and Mining, (London, 1923), p. 143.

[4] 21/10/1915 Reports by John Norton-Griffiths, National Archives WO158/129.

[5] J. Young, ‘Notes on 179 Company R.E.’, Tunnellers’ Old Comrades Association Bulletin, No. 13, (1938), pp. 70-72.

[6] Possibly Richardson intended a ‘fougasse’, whereby the effect of burying the German trenches with a mass of debris was increased by first blowing a shallow mine then immediately afterwards a deeper charge.

[7] J. W. Burrows, The Essex Regiment 9th, 10th, 11th, 13th & 15th Battalions, (Southend-on-Sea, n.d.), p. 149.

[8] 53 Brigade WD, Intelligence Report 23-24/1/16; Brigade Operations Report 30/1-5/2/16; R. Whitehead, The Other Side of the Wire, Vol. 1, (Solihull, 2010), pp. 354-357.

[9] Young, ‘Notes on 179 Company R.E.’, op. cit.

[10] H.M. Hance, letter to J. E. Edmonds, June 1930, CAB45/134.

[11] Young, ‘Notes on 179 Company R.E.’, op. cit.

[12] Hance to Edmonds, op. cit.

[13] Mining plans, 179th and 185th Tunnelling Companies, National Archives, WO153/904.

[14] Bullock, ‘Exploits in the First World War’, op. cit.

[15] H.M. Hance, Weekly Mine Report, 5/7/16, 34 Division GS War Diary.

[16] Kriegstagebücher, Pionierbataillon Nr. 13, 1. Reserve-Kompanie M414 Bd. 251-260, Landesarchiv Baden-Württemberg Hauptstaatsarchiv Stuttgart.

[17] Young, ‘Notes on 179 Company R.E.’, op. cit.

[18] R.U.H. Buckland, ‘Experiences At Fourth Army Headquarters’, Royal Engineers Journal, 1927, p. 386.

[19] T.S. transcript of interview with H. R. Kerr by A. Barrie, c. 1959, Barrie Papers, Royal Engineers Museum.

[20] A.G.B. Urmston, letter to J. E. Edmonds, 11/6/1930, National Archives, CAB45/191.

[21] S. Jones, Underground Warfare 1914-1918, (Barnsley, 2010), pp. 118-120.

[22] III Corps Operation Order No. 70, 20/6/1916 III Corps GS War Diary; 103 Infantry Brigade Operation Order No. 24, 21/6/16 103 Brigade GS War Diary; 101 Brigade Operation Order No. 34 23/6/16, 101 Brigade GS War Diary.

[23] 1st Brigade, Canadian Field Artillery War Diary; 1st Canadian Infantry Battalion War Diary; A. Fortescue Duguid, Official History of the Canadian Forces in the Great War 1914-1919, General Series Vol. I, (Ottawa, 1938), pp. 487-489.

[24] The largest mine on the Western Front was 50 tonnes, blown by the Germans at Vauquois on 14 May 1916; the largest British mine of the war was 43.2 tonne mine blown at St. Eloi on 7 June 1917. See S. Jones, Underground Warfare 1914-1918, op. cit., pp. 63-64.

[25] Bullock, ‘Exploits in the First World War’, op. cit.

[26] Bullock, op. cit.

[27] Unidentified soldier of the 10th Lincolns quoted E. Swinton (ed.), Twenty Years After, Vol. 2, (London, n.d.), p.928.

[28] J.C. Neill (ed.), The New Zealand Tunnelling Company 1915-1919, (Auckland, 1922), p. 47.

[29] Bullock, op. cit.

[30] ibid.

[31] ibid.

[32] Pte Elliott, 20/Northumberland Fusiliers (Tyneside Scottish), quoted G. Stewart & J. Sheen, Tyneside Scottish, (Barnsley, 1999), p. 97.

[33] S. C. Bullock, Address to Rotarians, (n.d.), unpublished T.S., courtesy Mrs. A. Russell.

[34] There is no evidence of anyone claiming to have heard mine explosions in England on 1st July 1916. This is apparently confused with the claim of the Prime Minister Lloyd George to have heard the detonation of the Messines mines on 7th June 1917, which itself is implausible: it is more likely that he heard the opening artillery salvo.

[35] Lewis appears to have greatly over-estimated the height to which the debris was thrown by the explosion. Cecil Lewis, Sagittarius Rising, (London, 1977), p. 89.

[36] Capt. Herries, 22/Northumberland Fusiliers (Tyneside Scottish), quoted G. Stewart & J. Sheen, Tyneside Scottish, (Barnsley, 1999), p. 98.

[37] Lt Col E K Cordeaux, quoted in P. Bryant, Grimsby Chums: the Story of the 10th Lincolnshires in the Great War, (Hull 1990), p. 58; M. Middlebrook, The First Day on the Somme 1 July 1916, (London, 1971), p. 120.

[38] Pte. H. Baumber quoted in P. Bryant, Grimsby Chums: the Story of the 10th Lincolnshires in the Great War, (Hull 1990), p. 56-57.

[39] Unidentified soldier of the 10th Lincolns quoted in E. D. Swinton (ed.), Twenty Years After, Vol. 2, (London, n.d.), p.928.

[40] Information from M. and T. Beech, Multi-Limn Survey, pers. comm. via P. Barton, 2013.

[41] J. E. Edmonds, Military Operations France and Belgium, 1916, Vol. 1 (London, 1932), pp. 375-384.

[42] R. Whitehead, The Other Side of the Wire, Vol. 1, (Solihull, 2013), Vol. 2, pp. 296-7.

[43] H.M. Hance, Weekly Mine Report, 5/7/16, 34 Division GS War Diary.

[44] A map in the British official history erroneously shows the tunnel running into the Lochnagar crater, J. E. Edmonds, Military Operations France and Belgium, 1916, Vol. 1, op. cit., Map Volume, map 8.

[45] R.N. Harvey, letter to J. E. Edmonds, n.d. (c. 1930) CAB45/189.

[46] J. E. Edmonds, Military Operations France and Belgium, 1916, Vol. 1, op. cit. p. 382, fn.

[47] My grateful thanks go to Ralph Whitehead for collating and providing this data. The number killed or missing but not taken prisoner on 1st July was 35, and another eight missing but not prisoners during the period, i.e. a total of 43 men. See also R. Whitehead, The Other Side of the Wire, Vol. 2, (Solihull, 2013).

(c) Simon Jones